
Slipped Stitch Edge in Garter Stitch – A Simple Trick for Neater Edges
Knitting a clean, professional-looking edge can be tricky, especially in garter stitch. If you’ve ever struggled with uneven or messy edges, this simple slipped stitch technique will change the way you knit. By slipping the first (or last) stitch of every row, you can create a beautifully structured edge that looks polished and refined.
In this guide, I’ll walk you through step-by-step instructions, share when to use a slipped stitch edge, and explain the difference between slipping the first stitch versus the last stitch. Plus, you can follow along with my YouTube tutorial for a visual demonstration!
Why Use a Slipped Stitch Edge?
A slipped stitch edge is a subtle yet powerful technique that enhances your knitting in several ways:
✔ Prevents curling – Especially useful in garter stitch projects.
✔ Creates a tidy, uniform edge – No more jagged or uneven sides.
✔ Makes seaming easier – If you plan to join pieces, a structured edge simplifies the process.
✔ Ideal for scarves, shawls, and blankets – Great for projects where the edges will remain visible.
This technique is easy to learn and works well with both garter stitch and stockinette stitch.
How to Work a Slipped Stitch Edge in Garter Stitch
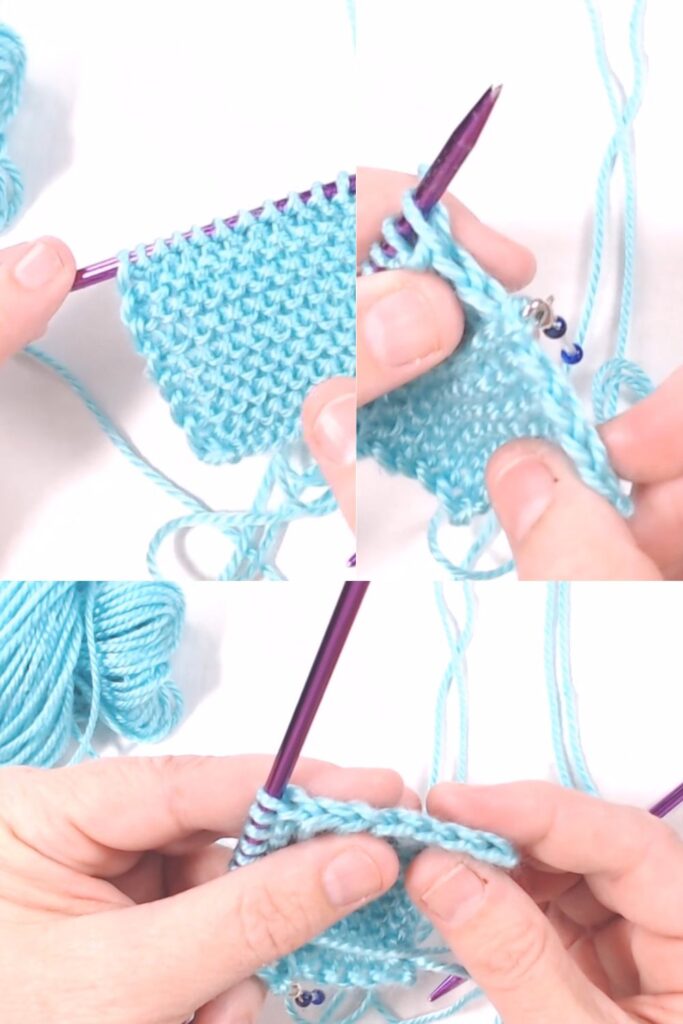
Option 1: Slipping the First Stitch of Every Row
This is the most common method and gives your knitting a smooth, chain-like edge.
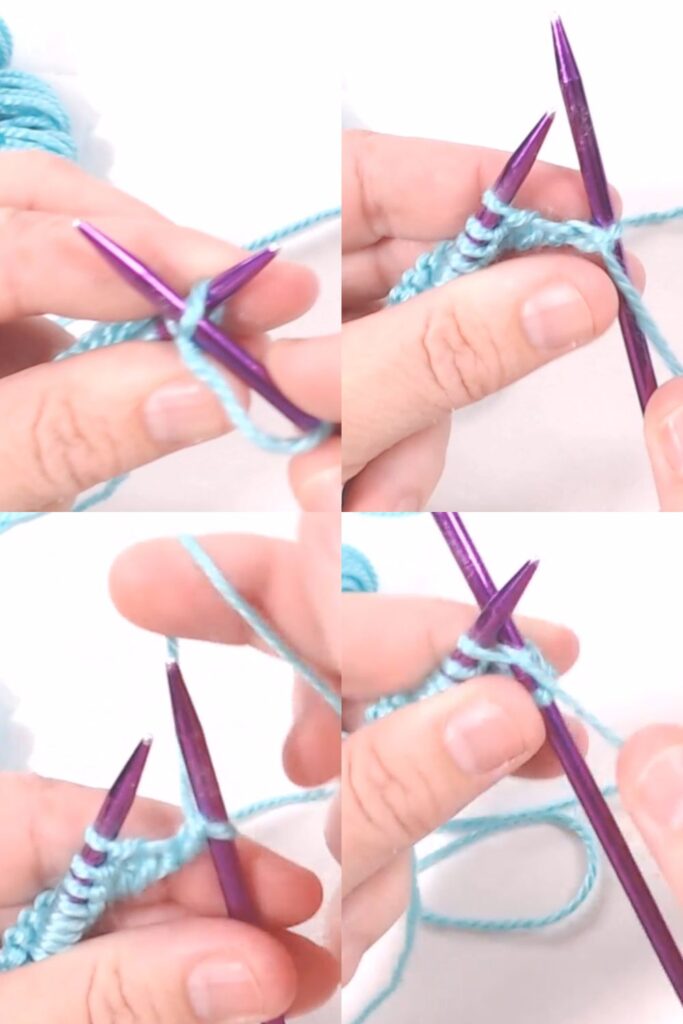
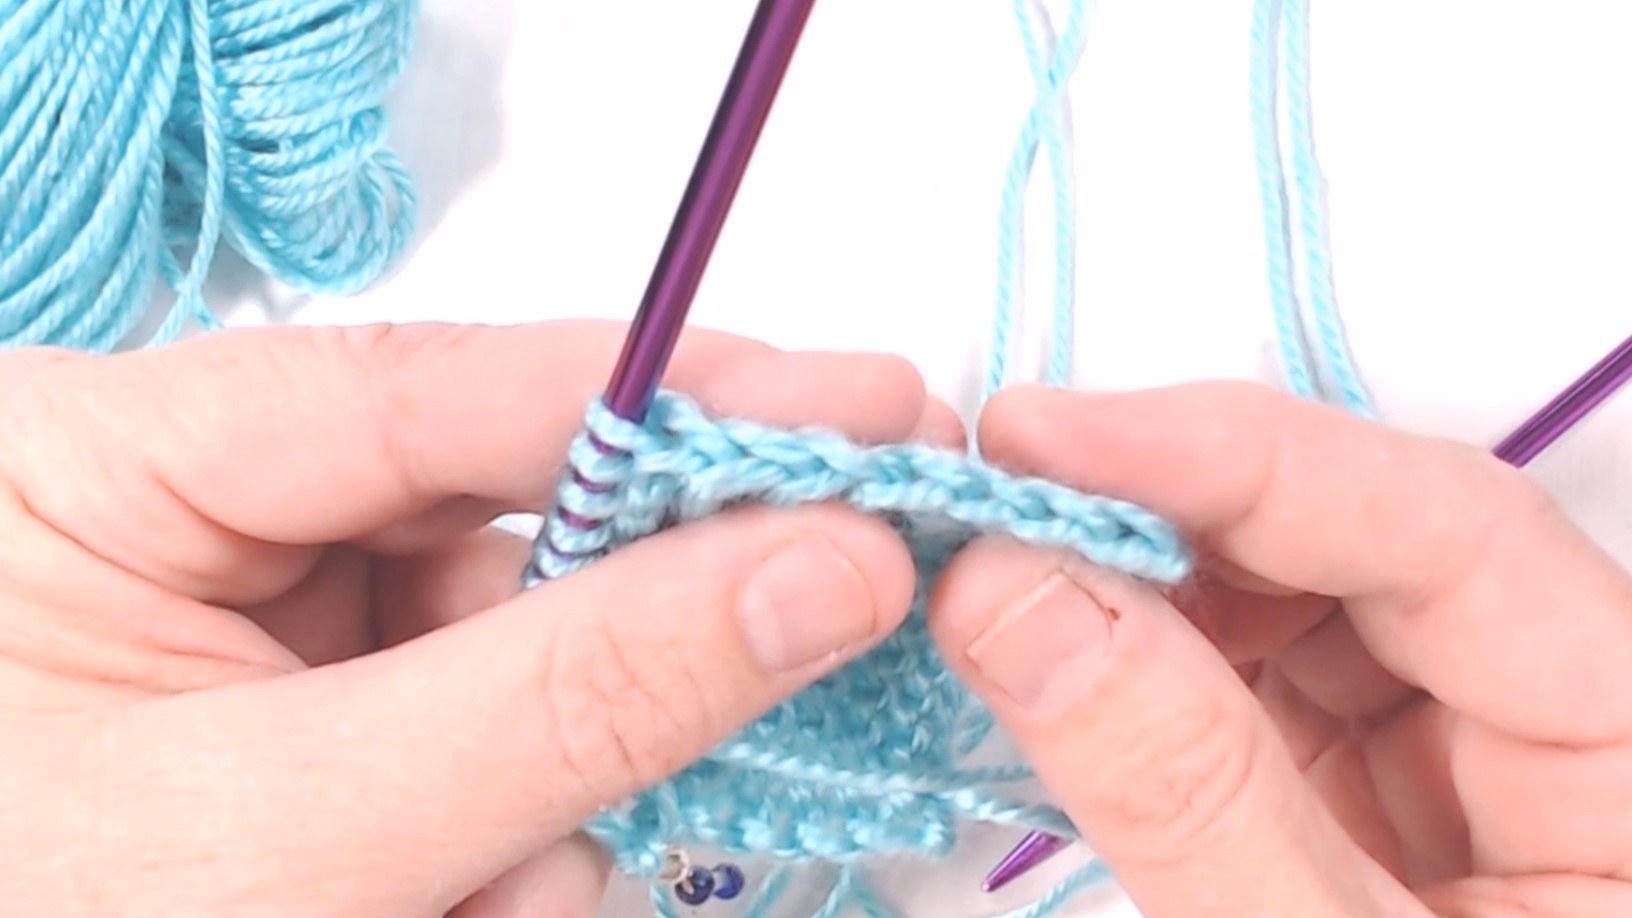
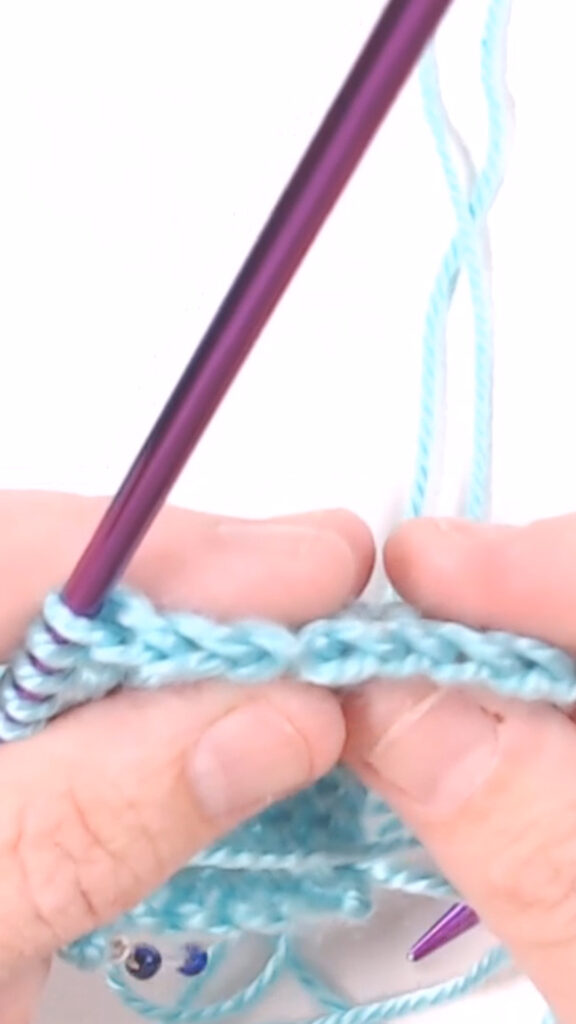
1️⃣ With your yarn in front, insert the right needle purlwise into the first stitch.
2️⃣ Slip the stitch from the left needle to the right without knitting it.
3️⃣ Move the yarn to the back and knit the rest of the row as usual.
4️⃣ Repeat this process on every row.
Result: This method produces a slightly rounded edge that is perfect for scarves, shawls, and blankets.
Option 2: Slipping the Last Stitch of Every Row
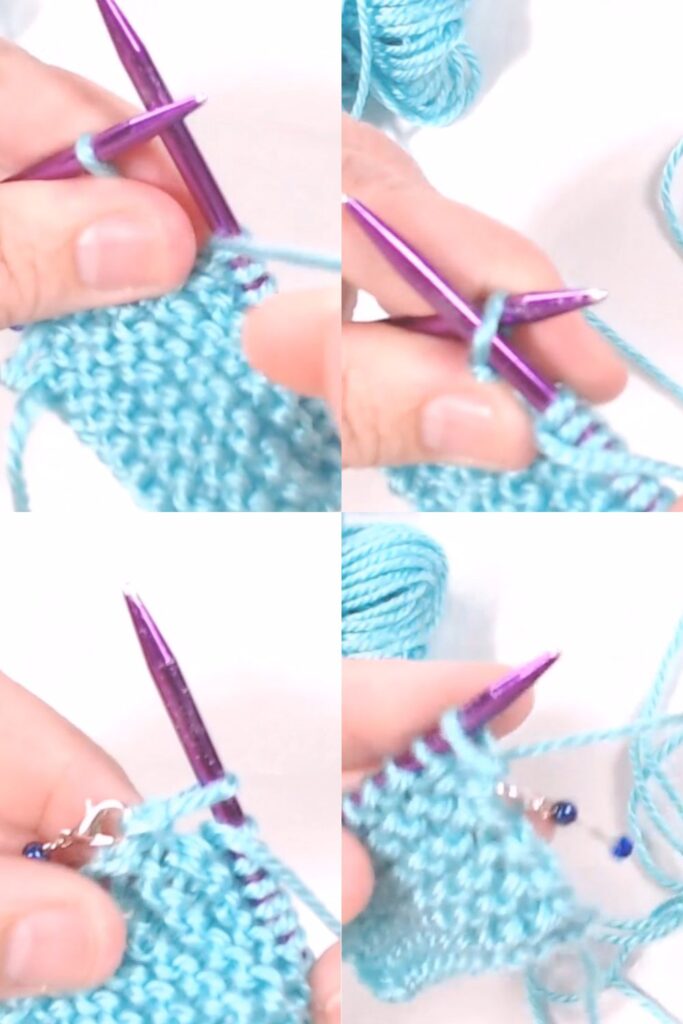
Some knitters prefer to slip the last stitch instead of the first. This method creates a squared-off edge that can be useful in projects where structure is needed.
1️⃣ Knit across the row normally.
2️⃣ When you reach the last stitch, bring the yarn to the front.
3️⃣ Insert the right needle purlwise and slip the stitch off without knitting.
4️⃣ Turn your work and knit the next row as usual.
Result: This method produces a firmer, straighter edge, which can be helpful in projects that require more stability.
Which Method Should You Use?
| Method | Best For | Edge Look |
|---|---|---|
| Slipping First Stitch | Scarves, shawls, blankets, decorative edges | Soft, rounded edge |
| Slipping Last Stitch | Seams, structured projects, dishcloths | Firm, squared edge |
The key is consistency—whichever method you choose, stick with it throughout the entire project!
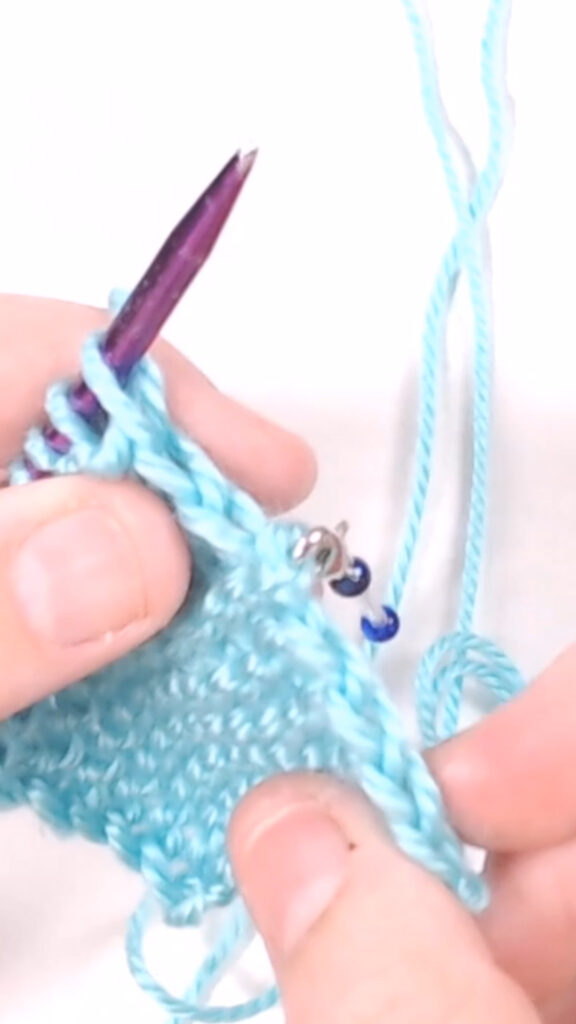
The Marker shows where we transitioned from slipping the first stitch to slipping the last stitch. You can see that both ways create a neat, straight edge.
Common Mistakes and How to Fix Them
🔹 Forgetting to bring the yarn forward (or back): If you don’t reposition the yarn before slipping, you might accidentally create extra stitches. Always check your yarn placement!
🔹 Inconsistent slipping: If you alternate between slipping the first and last stitch randomly, your edges will look uneven. Choose one method and stick with it.
🔹 Not maintaining tension: If your slipped stitches are too loose, they may appear stretched. Keep an even tension while knitting.
Final Thoughts
Using a slipped stitch edge in garter stitch is a simple trick that makes a big difference in your knitting projects. Whether you’re working on a scarf, a cozy blanket, or even a garment, this technique helps create a clean, polished look.
Which method do you prefer—slipping the first stitch or the last stitch? Let me know in the comments below!
Next Steps
Edges & Finishing: Clean Knitting Techniques for Polished Results
")
")

")