
How to Fix Dropped Stitches at the End of a Row – Step-by-Step Guide
Fix dropped stitches like a pro. Every knitter has been there. You pick up your work and notice that a stitch, or two, has slipped off the needle at the end of a row and started to unravel. It looks messy and a little alarming, but this is one of the most fixable mistakes in knitting. With a crochet hook and a little patience, you can rescue those stitches and get right back to knitting.
In this guide, I’ll walk you through exactly how to repair stitches that have dropped and unraveled at the end of a row, including how to handle the loose tension that’s left behind. There’s a full video tutorial below so you can follow along and see every step in real time.
Why Dropped Stitches Happen at the End of a Row
Before jumping into the fix, it helps to understand why edge stitches are so prone to slipping off in the first place:
- Loose edge tension: End stitches are naturally a little looser, which makes them easier to drop.
- Slippery needles: Metal needles in particular can let stitches slide right off if your tension is relaxed.
- Pulling on your work: Tugging your knitting to check gauge or adjust your hold can accidentally dislodge a stitch.
- Turning your work: If the yarn isn’t positioned correctly when you turn at the end of a row, a stitch can slip.

The good news is that none of these cause permanent damage. Let’s fix it.
What You’ll Need
- A crochet hook (sized close to your knitting needle)
- A safety pin or a locking stitch marker (as a temporary holder if needed)
- Your knitting needles
Step-by-Step: How to Fix Dropped Stitches at the End of a Row
Step 1: Stop the Unraveling
The first priority is to keep things from getting worse. If you’ve just noticed the drop, don’t pull on your knitting or set it down in a way that puts more tension on those loose stitches.
If you’re not ready to repair right away, slide a safety pin or a locking stitch marker through each dropped stitch to hold it in place. This keeps the stitches from unraveling further while you get your crochet hook.
When you’re ready to repair, insert your crochet hook through the dropped stitches to catch and secure them.
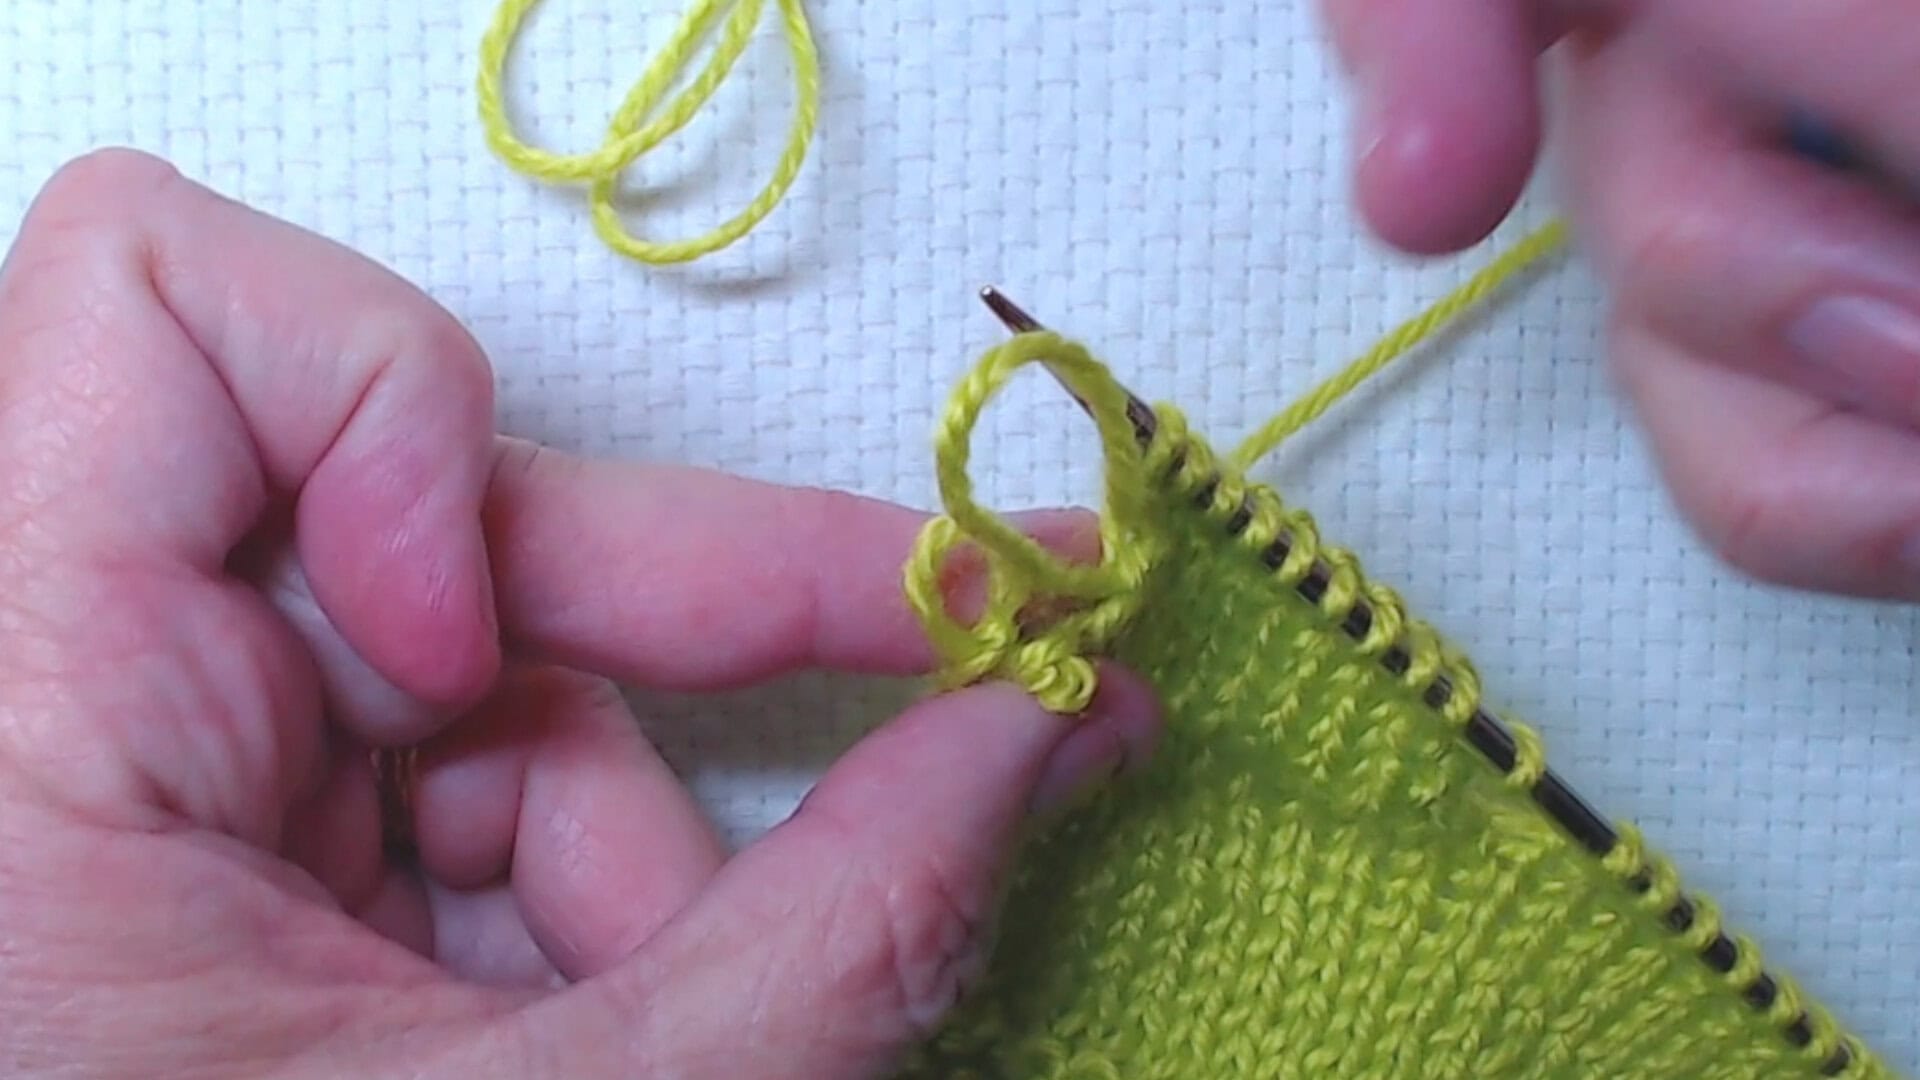
Step 2: Identify the Unraveled Rows
Look at the loose yarn hanging just above your dropped stitch. Each horizontal strand (called a bar or ladder) represents one row that has unraveled. If two stitches dropped two rows, you’ll see two bars and two stitches sitting on your crochet hook. I insert my index finger into the loop that are the 2 row those stitches dropped.
Your job is to work each stitch back up through those bars, one row at a time, starting from the bottom.
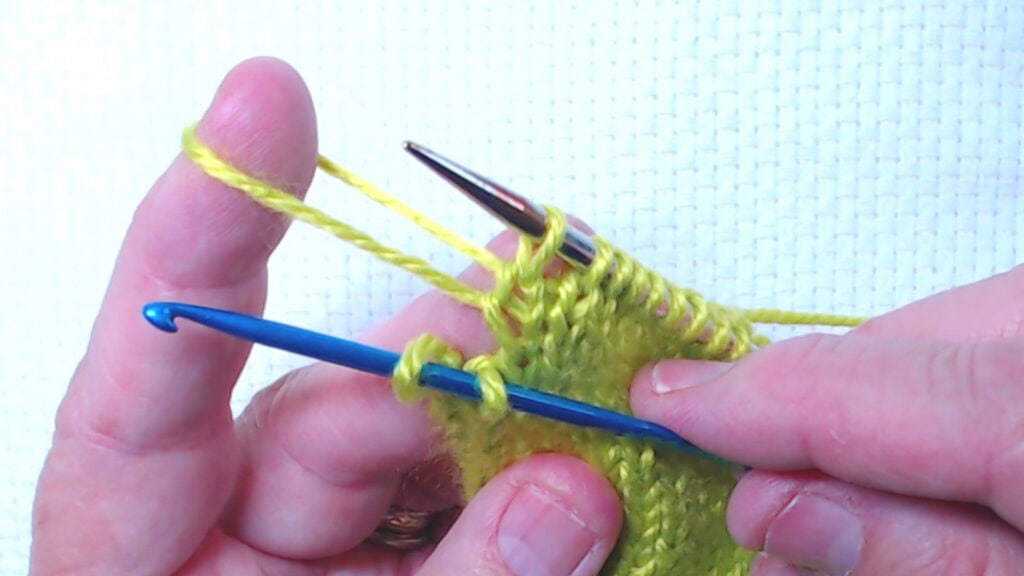
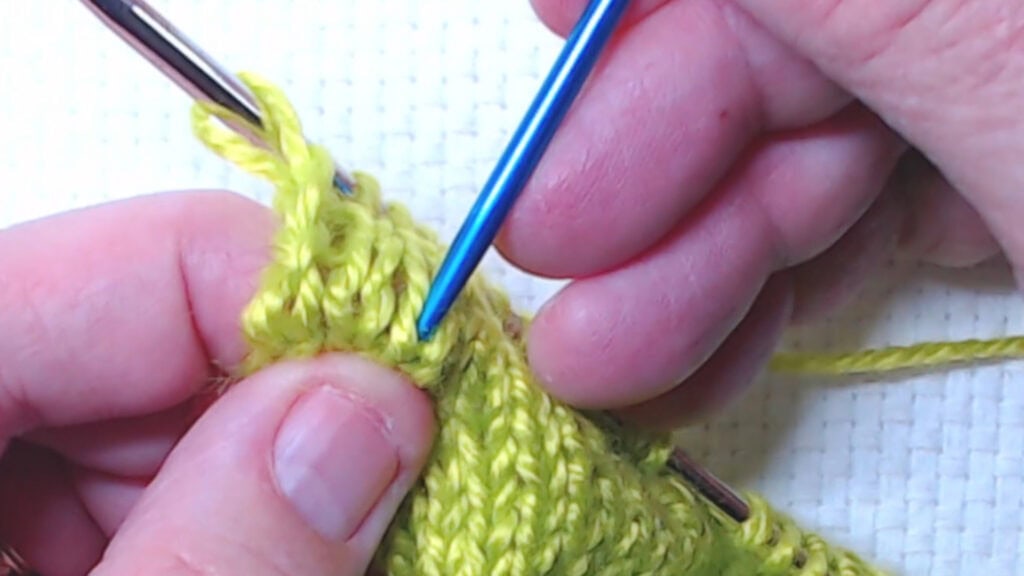
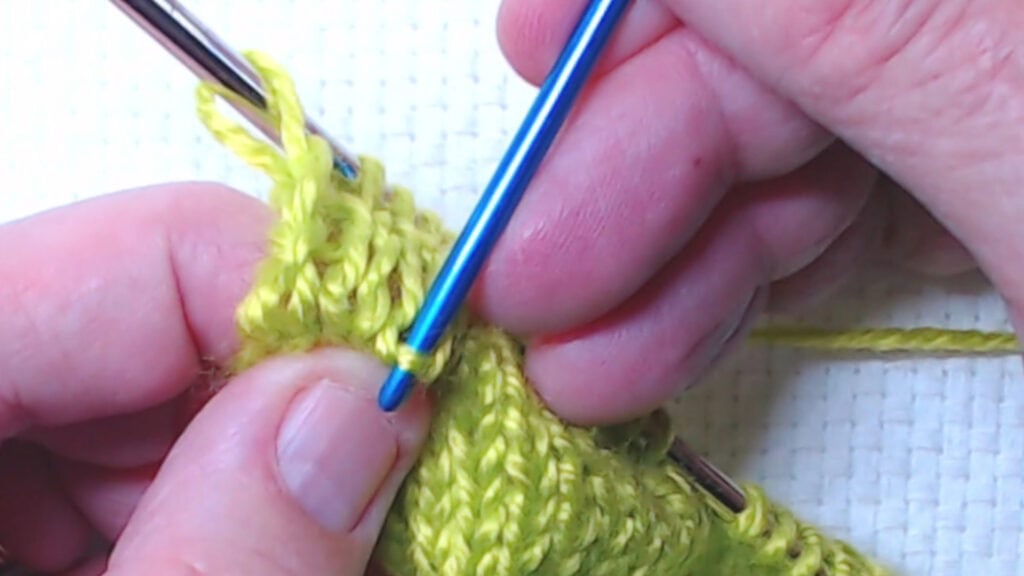
Step 3: Use a Crochet Hook to Repair the Stitches
With your crochet hook inserted through the dropped stitch, here’s how to bring it back up:
- Identify the bottom bar, that’s the first row you need to re-knit.
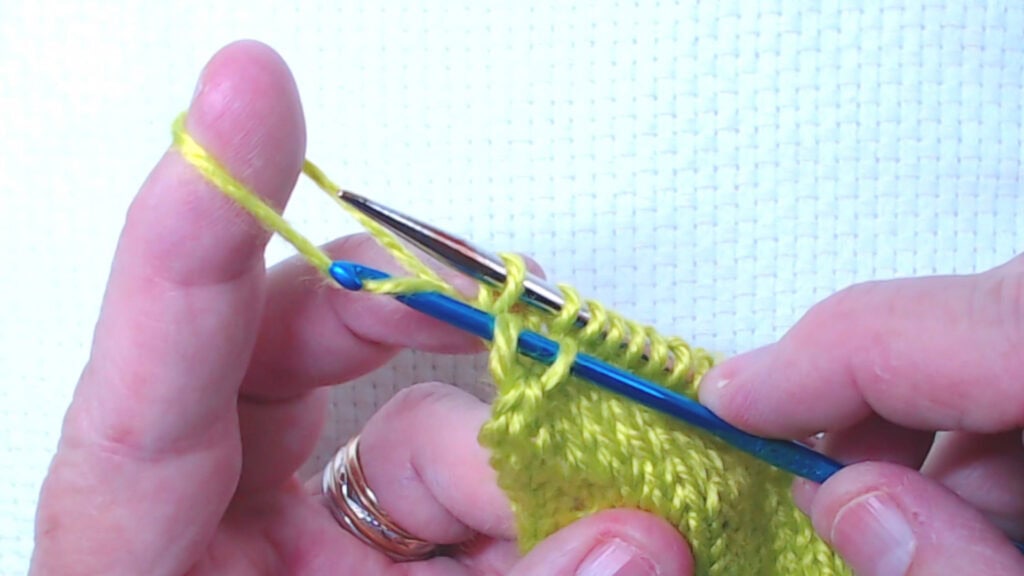
- Hook the bottom bar and pull it through the outer stitch on your hook. You’ve now restored one row.
- Move up to the next bar and repeat. Pull it through the outer stitch now on your hook.
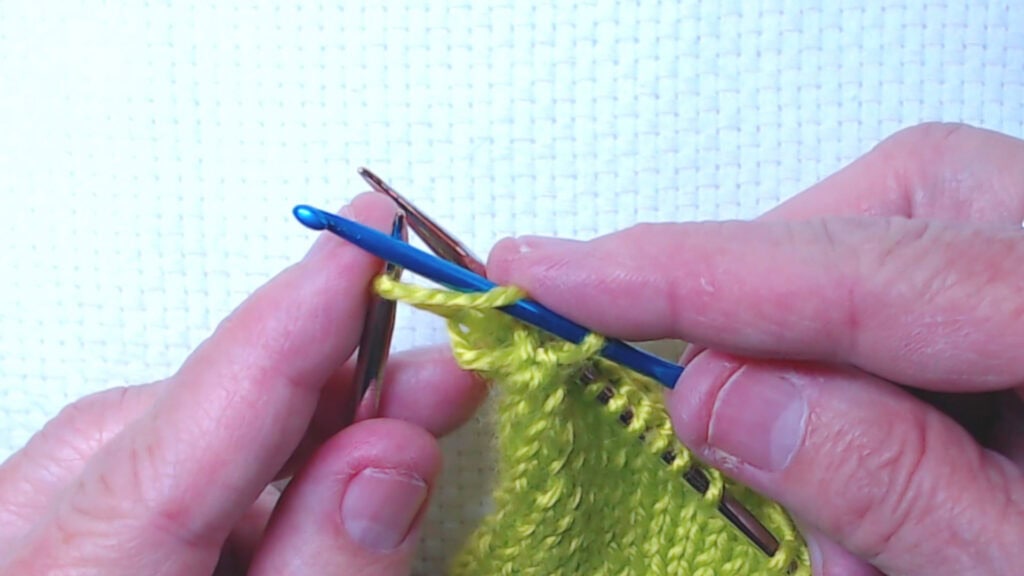
- Continue until the stitch has been worked back up to the level of your needle.
- Place the repaired stitch back onto your left needle.
Then repeat the entire process for any additional dropped stitches.
A note on tension: As you work, the stitches may feel tight and the crochet hook can be hard to maneuver. If that happens, ease your grip on the yarn a little and gently tug the stitch on the hook to loosen it slightly before pulling through. Fraying yarn can make this trickier, just go slowly and wiggle the hook rather than forcing it.
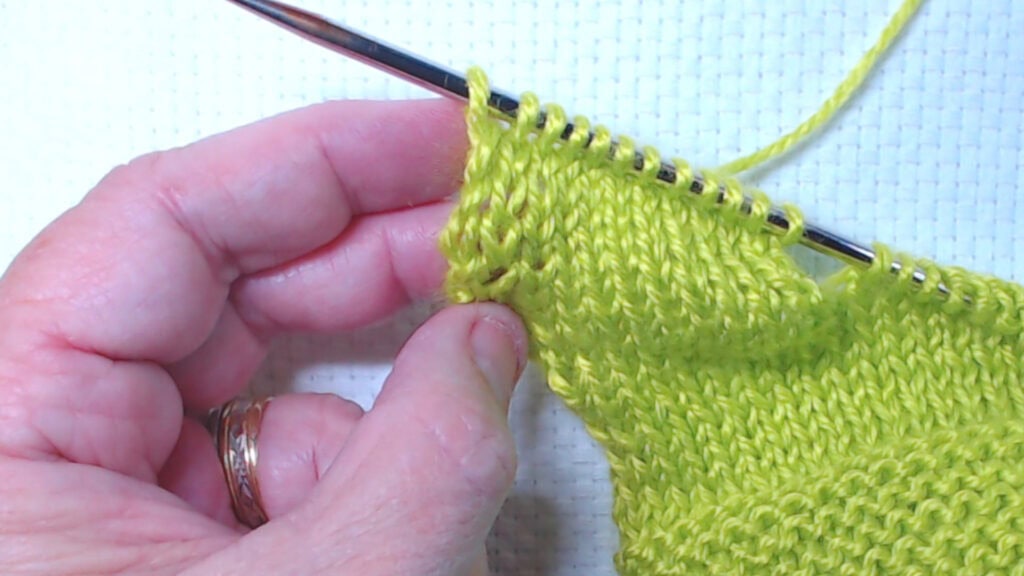
Step 4: Even Out the Tension at the Edge
Once you’ve got the stitches back on your needle, they, and the stitches right next to them, will likely look loose and uneven. That’s completely normal, and here’s how to handle it.
First, continue knitting as normal. As you work the next few rows, tug just slightly tighter than usual on those first couple of stitches to help pull in some of that extra slack.
Then, use your crochet hook to redistribute the remaining looseness. Insert the hook into the V’s of the stitches a couple of stitches in from the edge, not the loose ones themselves, but their neighbors, and gently tug on the bars between the rows. You’re not trying to create tight or loose stitches; you’re just coaxing the extra slack away from the edge and spreading it into the surrounding fabric where it will even out on its own.
Work through this area randomly rather than systematically. A little tugging here, a little there. You’ll see it start to look better fairly quickly.
When you’re done, continue knitting and purling normally. Tug just a touch tighter on those edge stitches for the next row or two, then go back to your regular tension. The more rows you add, the more those repaired stitches will blend in, and once you wash and block your finished project, any remaining unevenness will almost completely disappear.
Important: It will not look perfect right away, and that’s fine. Don’t keep fussing with it. Just keep knitting.
How to Prevent Dropped Stitches in the Future
A few simple habits can go a long way:
- Use bamboo or wooden needles if you’re prone to dropping stitches. The slight grip keeps stitches from sliding off.
- Practice consistent tension, try not to tug hard on your work while it’s on the needles.
- Slip the first stitch of each row to create a neater, more stable edge.
- Set your knitting down carefully, if you need to put it aside mid-row, take a moment to make sure the end stitches are securely on the needle.
Final Thoughts
To fix Dropped Stitches at the end of a row looks scarier than it is. A crochet hook, a few minutes, and a little patience is all it takes to get your knitting back on track. And remember, every experienced knitter has done this. It’s just part of the process.
Next Steps
- How to Fix a Dropped Stitch on the Knit Side (Stockinette)
- How to Fix a Dropped Stitch on the Purl Side (Stockinette)
- Fix More Knitting Problems
Happy knitting!

")
")
")