
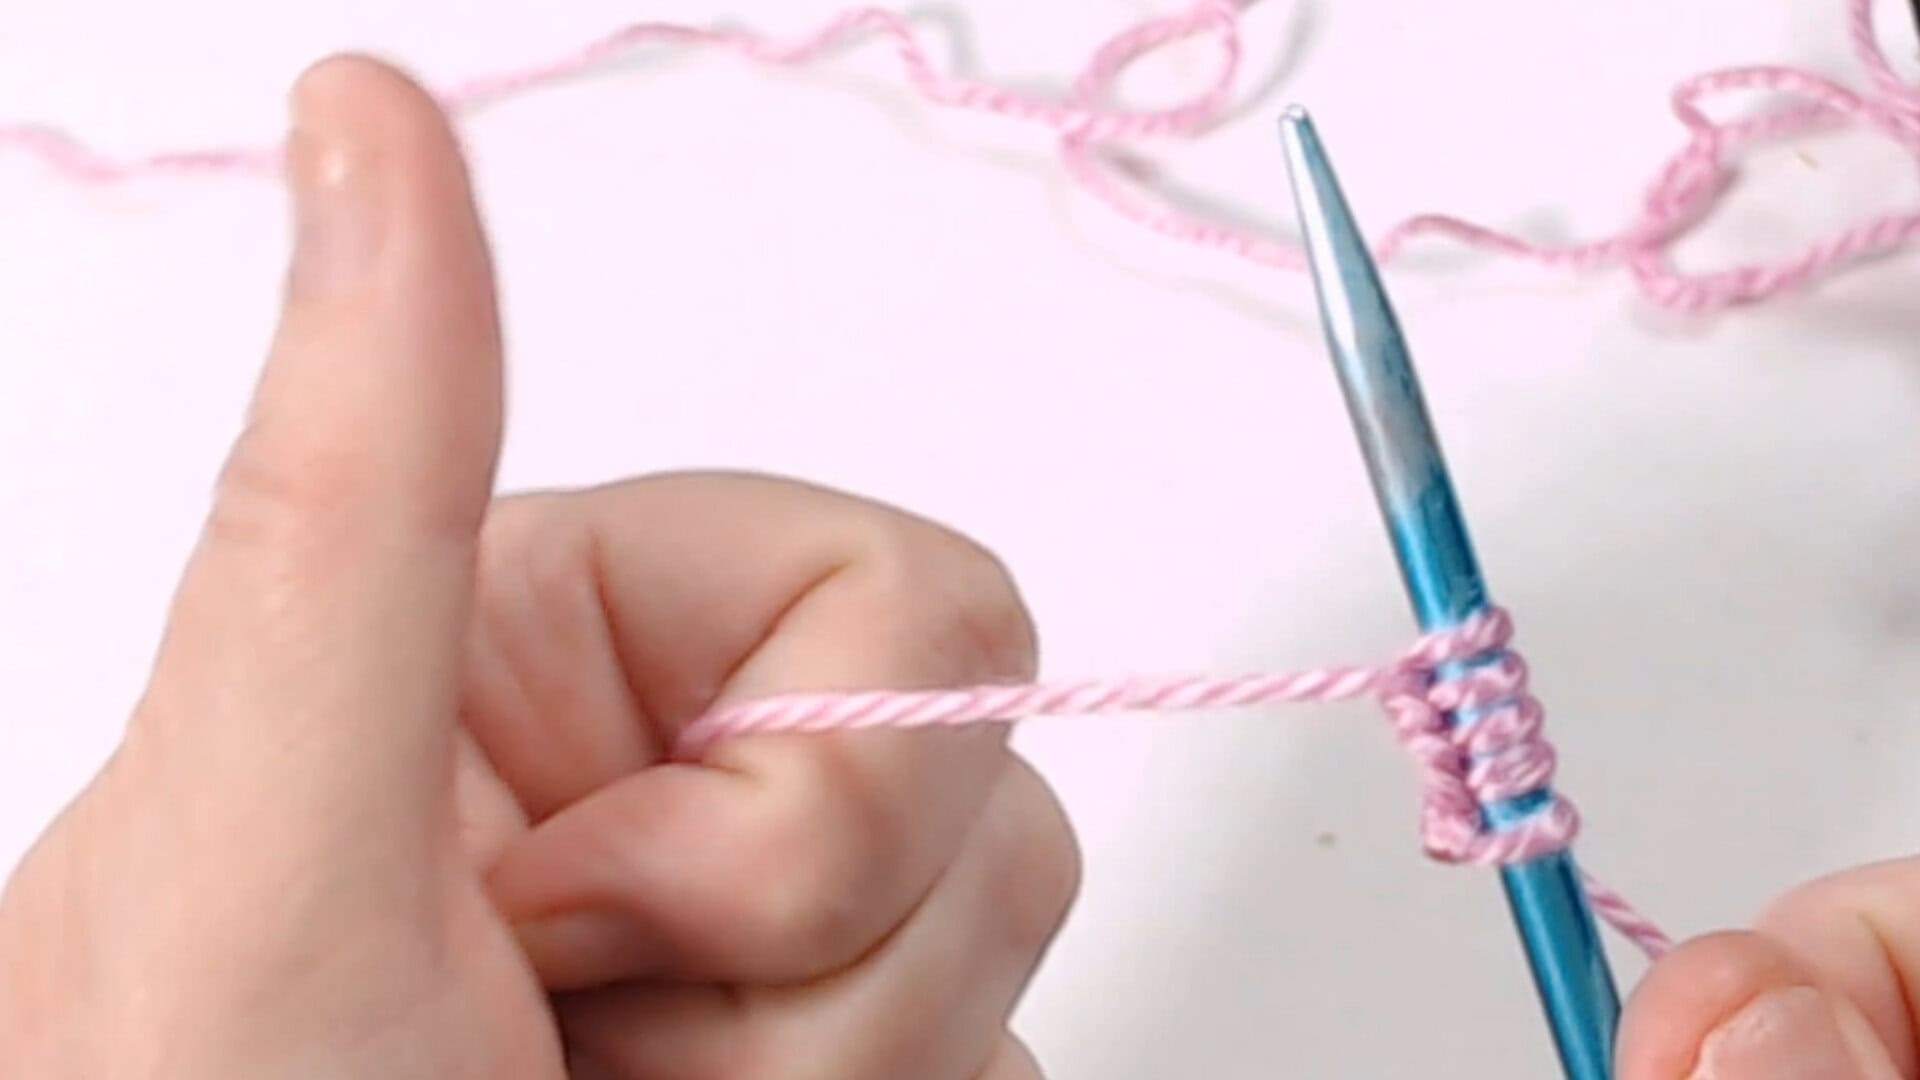
Thumb Method Cast On: 1 Easy Way to Start Knitting
The Thumb Method Cast On is one of the most popular cast ons in knitting. It creates a clean, even edge and works up quickly once you get the hang of it. But the traditional method can feel like a lot to coordinate the first time you try it, especially when you’re still getting comfortable holding the needles and the yarn.
This post walks you through a simplified version that I’ve been teaching beginners for years. Instead of the slingshot position, this thumb method cast on uses your thumb to form each stitch, which many beginners find easier to learn. It breaks the motion down into steps that are easier to follow and gets you casting on with confidence faster. There’s a full video below so you can watch every step in real time.
What You’ll Need
- A pair of knitting needles
- A ball of yarn
- A little patience with yourself
Why This Method Works for Beginners
The standard long tail cast on teaches you to hold both strands of yarn in your hand and move through the motion in one fluid sweep. That works great once it clicks, but for many beginners it’s hard to see what’s happening or why.
This simplified Thumb Method Cast On version slows the motion down into separate steps so you can understand what each part of your hand is doing before putting it all together. Once it makes sense, it starts to feel natural quickly.
How to Do the Simplified Thumb Method Cast On
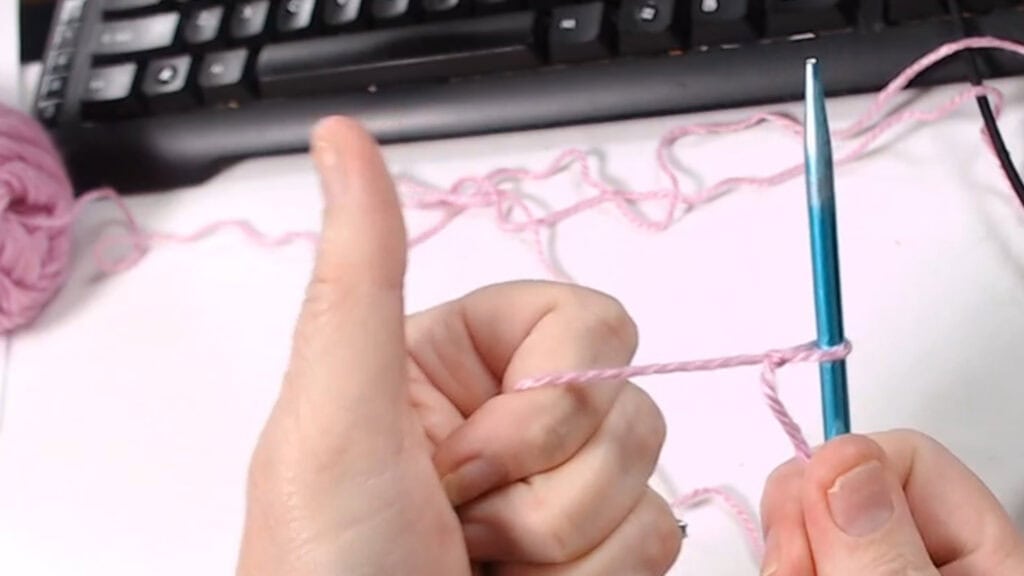
Step 1: Make Your Goalpost
Hold the long tail of your yarn in your left hand and stick your thumb straight up. You should see a bar of yarn across your thumb. Your thumb pointing up and the needle pointing up side by side — that’s your goalpost, just like in football.
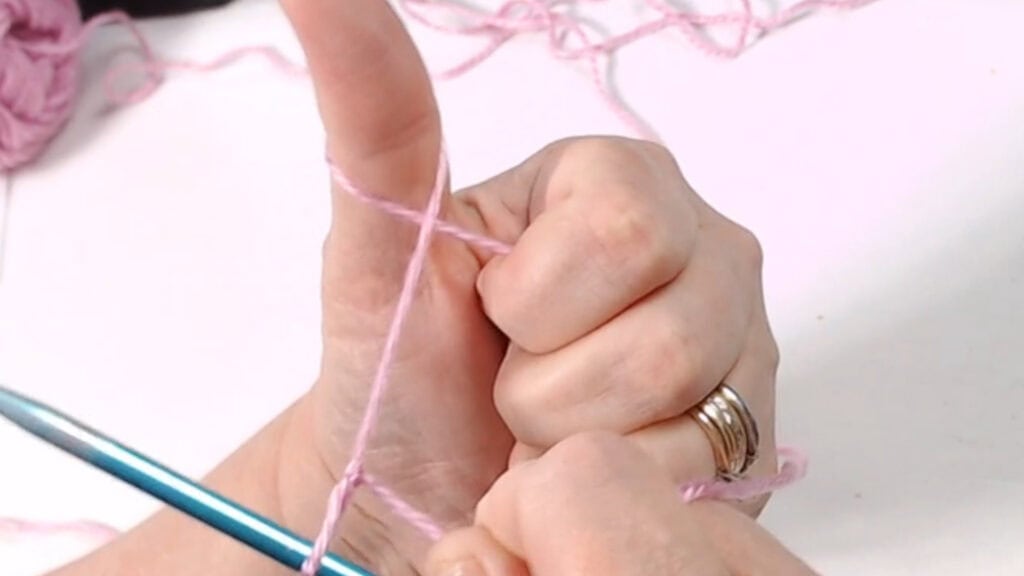
Step 2: Wrap the Yarn Around Your Thumb
Starting with your thumb pointing up, go over the bar of yarn and wrap the yarn all the way around your thumb. The key here is to go over the bar first and then wrap under and back up, so that the yarn makes a complete loop around your thumb.
If you go under the bar first, the yarn will not wrap all the way around. You want a full wrap, so always start by going over the bar.
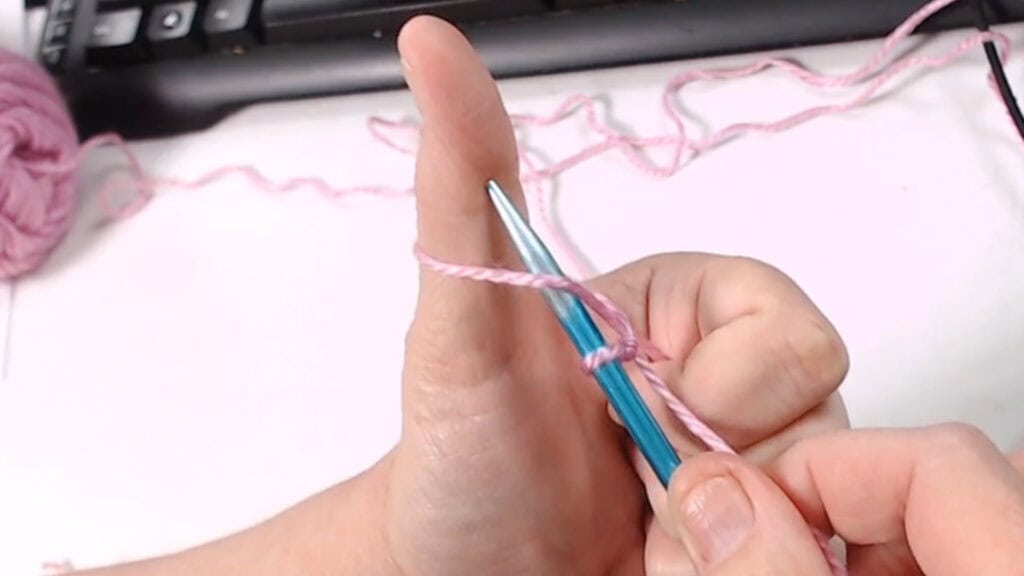
Step 3: Bring the Needle Under the Loop
Now that you have a loop around your thumb, take your needle and slide it underneath that loop from below.
Pinch the needle lightly between your fingers for a moment so it stays in place while you move to the next step.
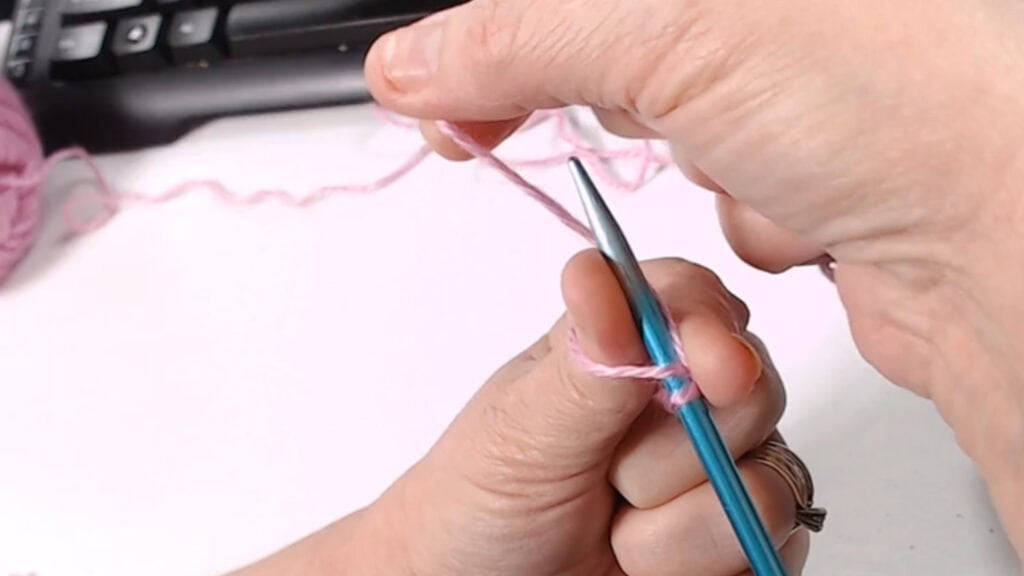
Step 4: Wrap the Working Yarn Around the Needle
Take the yarn that runs back to the ball, your working yarn. Bring it around behind your thumb and needle, then pull it forward so it comes up between your thumb and the needle.
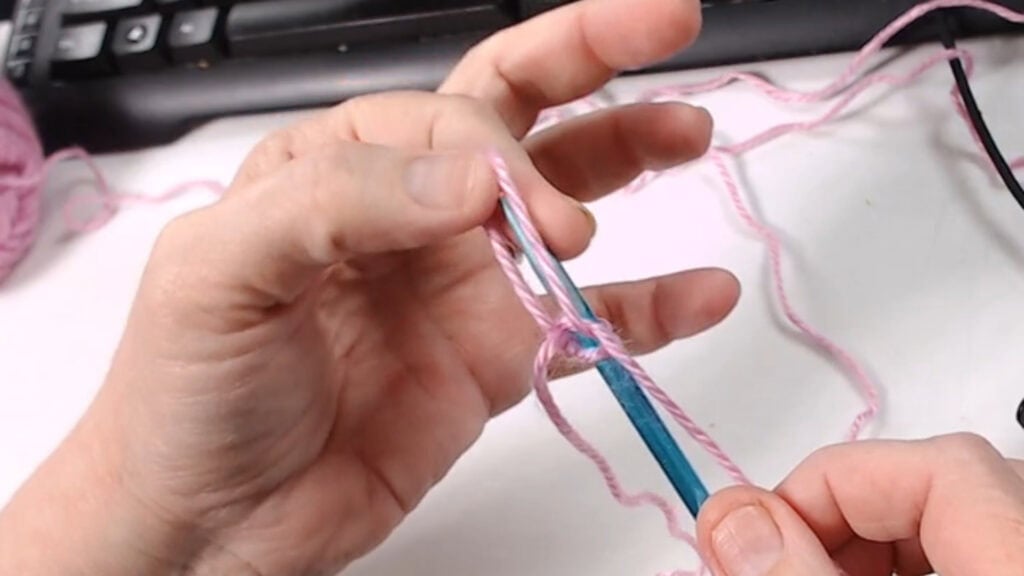
Step 5: Bring the Loop Up and Over
Take the loop that’s sitting on your thumb and bring it up and over the tip of the needle. Let it slip off your thumb.
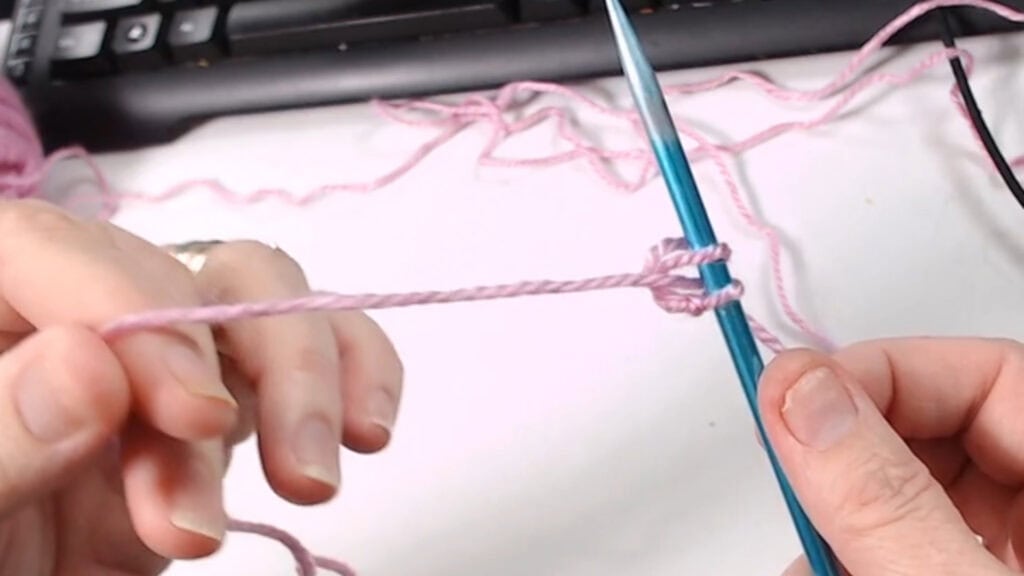
Step 6: Tighten the Stitch
Pull gently on the long tail to tighten the new stitch onto the needle. That’s one stitch made.
Repeat Steps 1 through 6 until you have the number of stitches your pattern calls for.
Tips for Getting It Right
Go over the bar first, always. This is the step that trips most people up. If your loop is not wrapping fully around your thumb, you’ve gone under first instead of over. Back up and try again.
Don’t worry about speed. The goal at this stage is to understand what each hand is doing. Speed comes on its own after a little practice.
Keep your tension relaxed. Casting on too tightly makes it hard to knit the first row. The stitches should slide along the needle without bunching up.
This Thumb Method Cast On leaves a clean, firm edge. It is not the stretchiest cast on, so if you’re starting a project that needs a lot of stretch at the cast on edge, like a hat brim worked from the bottom up, you may want to look at other options.
Frequently Asked Questions
What is the difference between the thumb method cast on and the standard long tail cast on? Both methods use two strands of yarn and produce a similar finished edge. The standard long tail cast on uses a slingshot position where you hold both strands in your hand and move through the motion in one continuous sweep. The thumb method cast on breaks that same motion into separate steps, using your thumb to form each stitch one part at a time. The finished edge looks almost identical. The thumb method is just easier to learn because you can see exactly what each hand is doing before putting it all together.
How do I know how much yarn to leave for the tail? A good starting estimate is about one inch of tail per stitch, plus an extra six inches at the end for weaving in. So if you are casting on 20 stitches, pull out roughly 26 inches of tail before you start. It is always better to have too much than to run out mid-cast on. If you are not sure, pull out more than you think you need and trim it later. Running out of tail and having to start over is one of the most common beginner frustrations with this method.
Can I use the thumb method cast on for any project? It works well for most beginner projects including scarves, dishcloths, blankets, and simple flat pieces. It leaves a clean firm edge that holds its shape. The one situation where you might want a different cast on is when you need a very stretchy edge, like the brim of a hat worked from the bottom up. For those projects a stretchy cast on method gives you more room to pull the finished piece over your head. For everything else the thumb method cast on is a reliable choice.
Why does my cast on edge look uneven? Uneven tension in the cast on row is the most common cause. If some stitches are tight and others are loose, try to keep your grip relaxed and consistent throughout. The stitches should slide along the needle without bunching up. If the whole edge feels too tight, try casting on with a needle one size larger than what your pattern calls for, then switch back to the correct size for your first row of knitting. That one trick fixes a tight cast on edge for most beginners.
What if I run out of tail before I finish casting on? You will need to start over with a longer tail. It happens to everyone at least once. Next time pull out significantly more yarn than you think you need before you begin. Some knitters wrap the yarn around the needle once for every ten stitches as a way to estimate the tail length before making the slip knot.
Final Thoughts
The easier Thumb method cast on can look intimidating the first time, but this simplified version breaks it down into steps that make sense even if you’ve never cast on before. The goalpost image is a little silly but it works — once you can picture it, the motion starts to click.
Next Steps
- Already comfortable with this method? See How to do a long tail cast on compares.
- Want to know how to start a Slip Knit? How to Make a Slip Knot for Knitting | Beginner Tutorial
- Ready to keep building your skills? Visit the Beginner Basics hub for more foundational techniques.
You Might Also Enjoy:
Find this helpful? Save JennyKnits as your go-to knitting resource on Google.
