
Long Tail Cast On: Step by Step for Beginners
If you’re just getting started with knitting, the long tail cast on is one of the most useful techniques you’ll learn. It creates a clean, even edge at the base of your project and works up quickly once the motion clicks. Most knitting patterns don’t specify which cast on to use, and this one is a reliable choice for almost everything a beginner will make.
This tutorial walks you through the long tail cast on step by step, starting with the slip knot and finishing with a full row of stitches on your needle. There’s a video below so you can follow along in real time.
This is Part 1 of the Knitting for Beginners series:
- Part 1: Long Tail Cast On (you’re here)
- Part 2: How to Knit Stitch
- Part 3: How to Purl Stitch
- Part 4: How to Bind Off
What Is the Long Tail Cast On?
The long tail cast on gets its name from the way it works. You start with a tail of yarn that’s long enough to cast on all your stitches. That tail and the working yarn from your ball work together to form each stitch, so by the time you’re done casting on, you already have a finished base edge on your needle.
It’s stretchy enough to work for most projects, leaves a tidy professional-looking edge, and once you have the slingshot motion down it goes quickly. It’s the cast on I come back to for scarves, dishcloths, blankets, and most beginner projects.
What You’ll Need
- A ball of yarn
- A pair of knitting needles appropriate for your yarn
- A little patience with yourself for the first few tries
How to Do the Long Tail Cast On Step by Step
Step 1: Make a Slip Knot
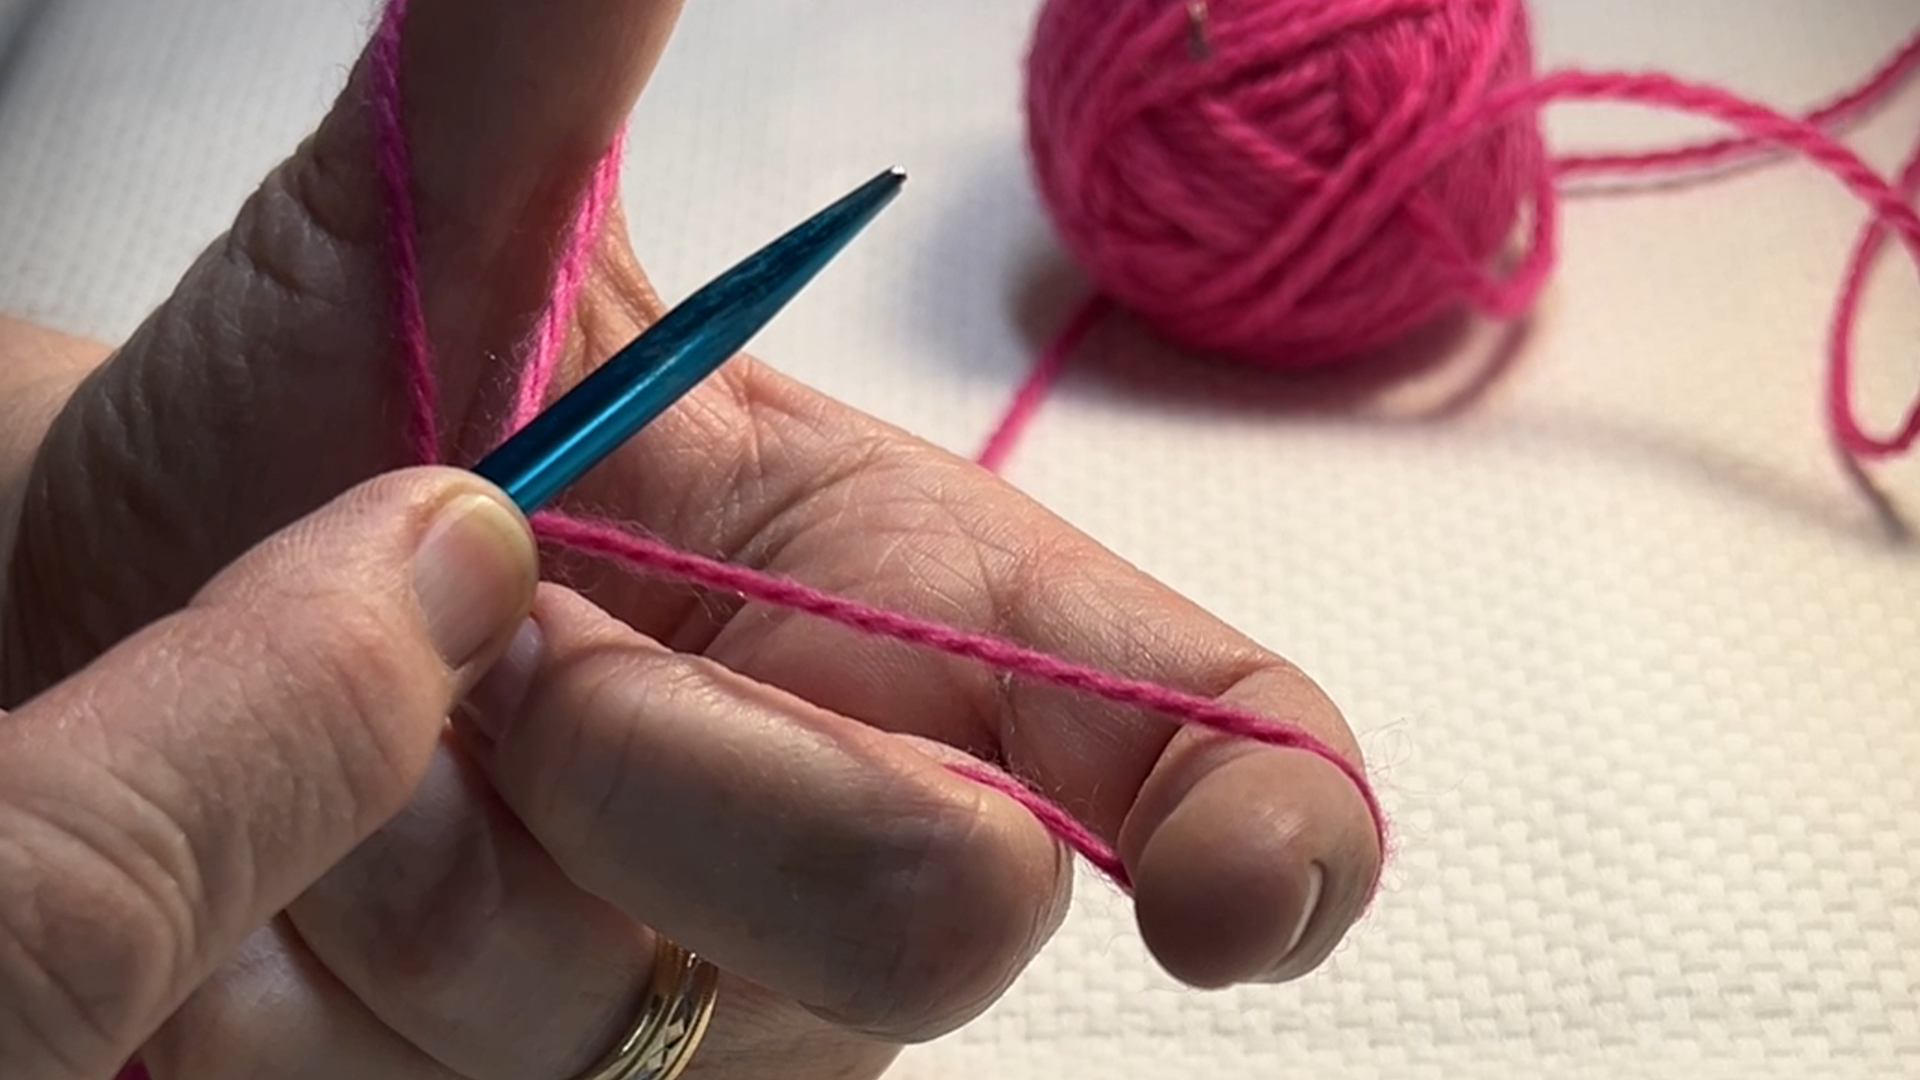
The long tail cast on starts with a slip knot, but the placement matters. You don’t want to tie the slip knot right at the end of the yarn. You need a tail that’s long enough to cast on all your stitches, so measure out some extra length before you make the knot. A rough guide is about an inch of tail per stitch, plus a few extra inches.
To make the slip knot, take your yarn and form the shape of the letter P. Then flip that loop over and pull the strand that runs through the middle up through the loop. That gives you a slip knot.
Place the slip knot on your needle and tighten it by pulling on one end of the yarn. You want it snug enough that it won’t fall off but loose enough that it slides easily along the needle. If it won’t tighten from one direction, try pulling the other strand.
Step 2: Set Up the Slingshot Position
Now you have two strands hanging from your needle; the tail and the working yarn that goes back to the ball. Grab both strands with your right hand to hold them in place, then slide your left thumb and index finger in between the two strands.
Spread your thumb and finger apart and pull back gently. The yarn will form a V shape between your fingers that looks like a slingshot. Keep some tension on both strands so the loops stay open and easy to work with.
This is your casting on position. Everything else comes from here.
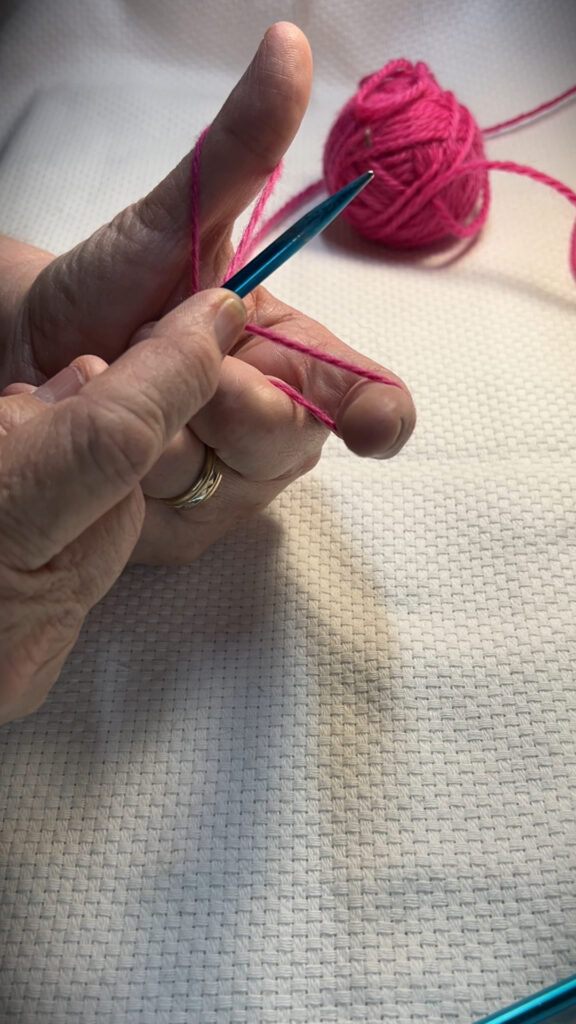
Step 3: Cast On Your Stitches
With the slingshot in place, here’s the motion for each stitch:
- Go under the loop that’s on your thumb, from below.
- Swing the needle over and wrap it around the strand on your index finger.
- Bring the needle back down through the hole on your thumb.
- Hold the new stitch on the needle with your index finger, then slip your thumb out of its loop.
- Pull gently on the tail to tighten the stitch, then put your thumb back into position for the next one.
Each time you complete that sequence, you’ve added one stitch to your needle. It feels awkward at first but after a few repetitions the motion starts to feel natural.
A few things to watch: your index finger stays in place the whole time while your thumb comes in and out for each stitch. And as you tighten each stitch, pull on the tail side rather than the working yarn side to get a clean snug fit.
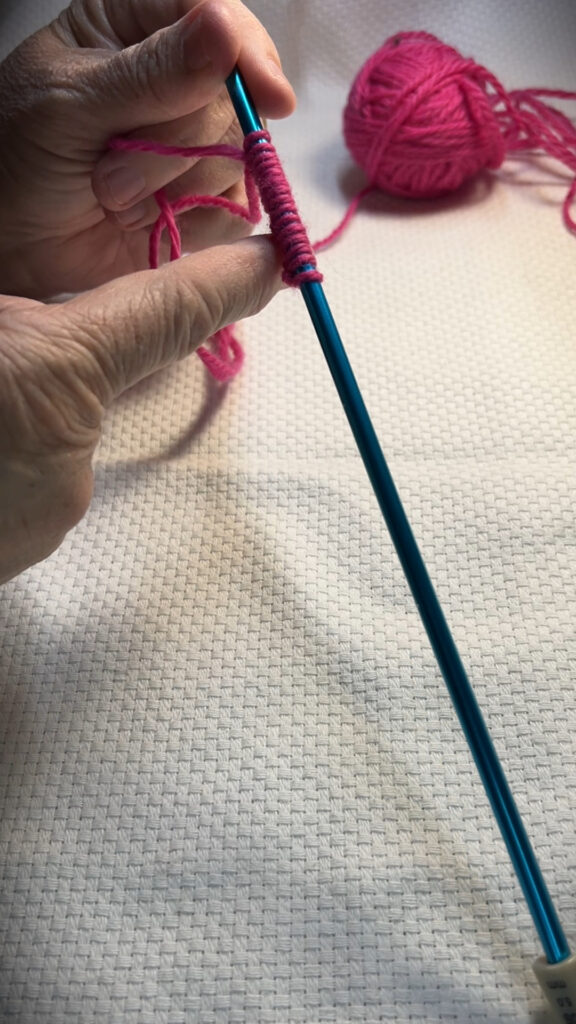
Step 4: Keep Going Until You Have the Right Number of Stitches
Continue casting on until you have the number of stitches your pattern calls for. Count your stitches as you go rather than trying to count them all at the end.
As you add stitches you’ll notice a little row of bumps forming along the bottom of the needle. That’s exactly what you want. If the row of bumps starts to curve around the needle instead of hanging straight down, pause and nudge the stitches back into place so all the bumps are lined up facing the same direction. A twisted row of cast on stitches makes the first row of knitting harder than it needs to be.
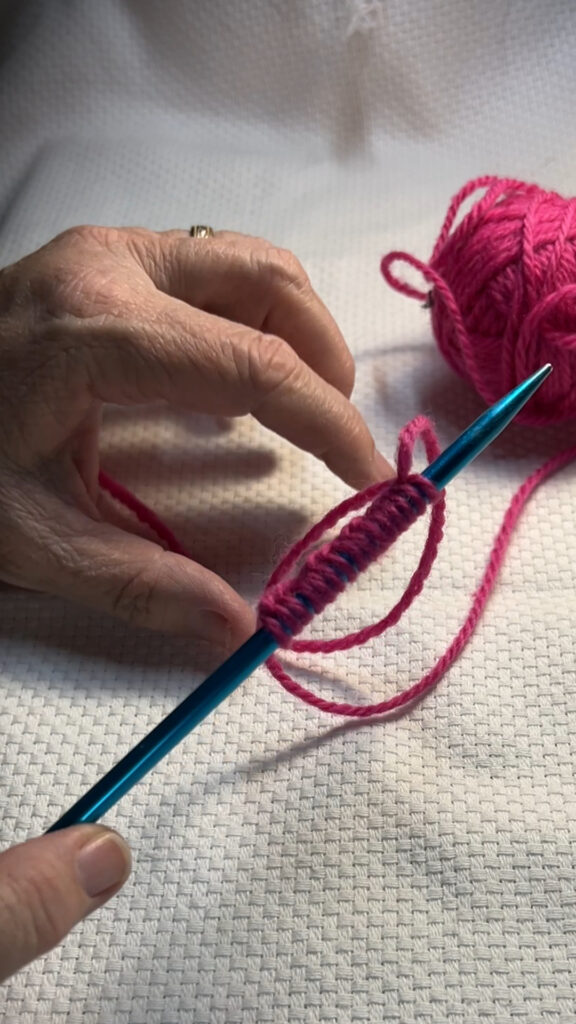
Step 5: Start Knitting with the Right End
Once you’ve cast on all your stitches, you’ll still have a tail hanging down. When you start knitting your first row, use the yarn that goes back to the ball, not the tail. The tail is just for weaving in later. Knitting with the tail by mistake is one of the most common beginner errors and it usually means running out of yarn partway through the row.
Tips for a Clean Long Tail Cast On
Estimate your tail length generously. Running out of tail mid-cast on is frustrating. It’s better to have too much and trim it later than to have to start over. For a project with lots of stitches, wrap the yarn loosely around your needle once for every ten stitches to measure out a rough estimate before you start.
Keep your tension consistent. Stitches that are too tight will be hard to knit into on the first row. Aim for stitches that slide along the needle without effort.
Go slowly on your first attempt. The slingshot position feels unnatural at first. Take it one stitch at a time, reset your hand position after each one, and don’t rush the tightening step.
Practice on scrap yarn. Before you cast on for a real project, cast on and rip out a dozen or so stitches on scrap yarn just to get the feel of it. Five minutes of practice makes the real thing much smoother.
Frequently Asked Questions
How long should my tail be? A general rule is about one inch of tail per stitch, plus an extra six inches at the end for weaving in. For a project with lots of stitches, measure by wrapping the yarn loosely around your needle once per stitch before you make the slip knot.
What if I run out of tail before I finish casting on? You’ll need to start over with a longer tail. It happens to everyone at least once. Next time, measure out more yarn than you think you need.
My cast on edge is really tight. What do I do? Try casting on with a needle one size larger than what your pattern calls for, then switch to the correct size needle for your first row of knitting. This is a common trick for loosening up a tight cast on edge. Here’s an extremely stretchy cast on edge if you need it.
Can I use the long tail cast on for all projects? It works well for most projects. The one exception is projects that need an extremely stretchy cast on edge, like toe-up socks or some hat brims. For those you might want a different method, but the long tail cast on will serve you well through most of what beginners make.
What’s the difference between the tail and the working yarn? The tail is the short end of yarn that hangs loose after your slip knot. The working yarn is the strand that runs back to your ball. Always knit with the working yarn.
Final Thoughts
The long tail cast on is worth learning well because you’ll use it for years. It takes a few tries to get comfortable with the slingshot position but once it clicks it becomes second nature. Cast on slowly, keep your tension relaxed, and don’t stress if the first few stitches look a little uneven. They always even out once you start knitting.
Next Steps
- Ready to start knitting? Move on to How to Knit Stitch for Beginners (Part 2)
- Find more beginner techniques in the Beginner Basics hub
")
")

")