
How to Make a Slip Knot for Knitting | Beginner Tutorial
Every knitting project starts the same way. Before you cast on a single stitch, you need a slip knot for knitting. This small adjustable loop is how your yarn attaches to the needle, and once it is on there you are ready to go.
There are a few ways to make a slip knot but this two-finger method is the one I teach beginners because it is simple, consistent, and easy to repeat. Watch me do it a couple of times before you try it yourself. Trying to follow along at the same time as watching tends to get confusing.
The full video is below so you can see every step up close.
What You Will Need
- Your yarn
- Your knitting needle
- Two fingers
How to Make a Slip Knot for Knitting Step by Step
Step 1: Hold the Yarn
Let your yarn dangle so you can see both ends clearly. Grab the yarn in your hand and close your fingers loosely around it. You should have one strand running back to the ball and one loose tail end.
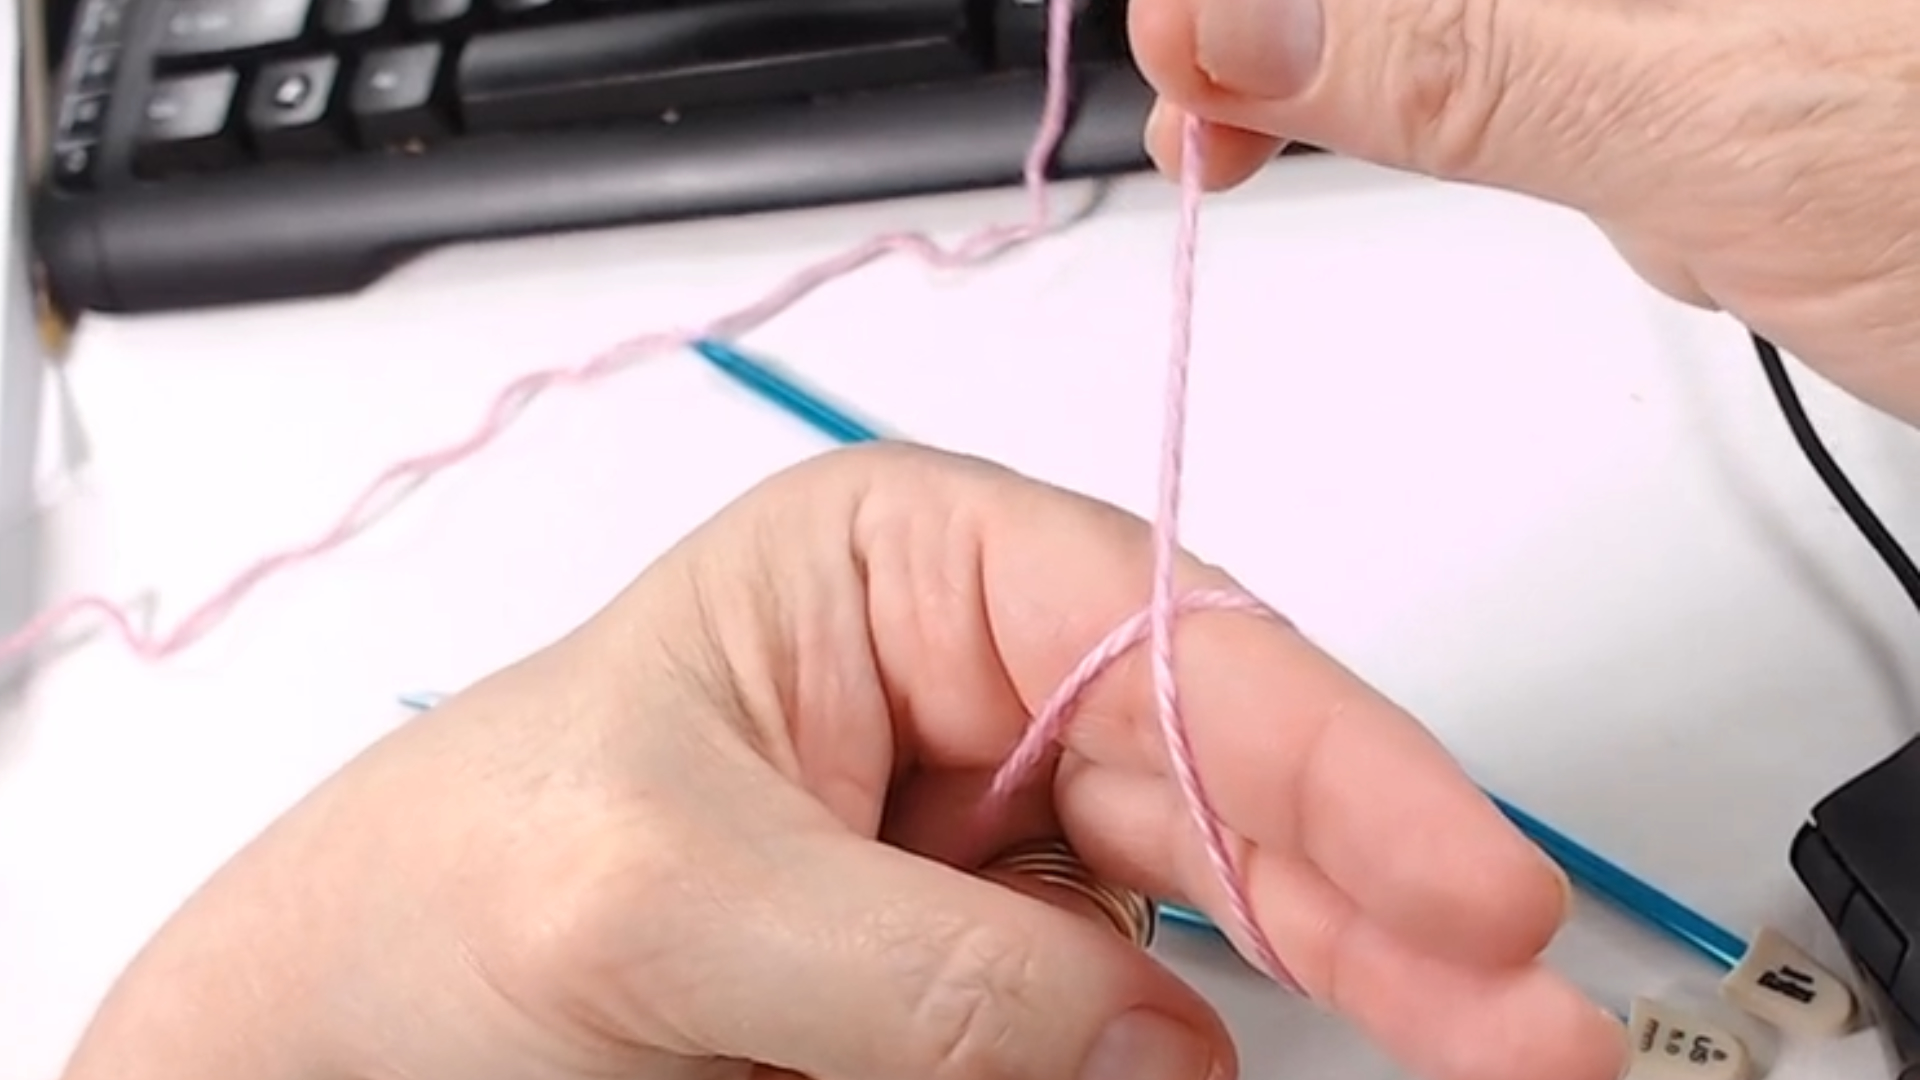
Step 2: Stick Out Two Fingers
Open your hand and extend two fingers. Keep them relaxed, not stiff.
Step 3: Wrap the Yarn Around Your Fingers

Wrap the yarn all the way around your two fingers one time. Keep the wrap loose and relaxed. You do not need to pull it tight.
Step 4: Drop the Yarn Toward Your Knuckles

Let the yarn drop so it sits close to your knuckles rather than near your fingertips. It just rests there while your fingers stay open.
Step 5: Reach In and Pull a Loop Through
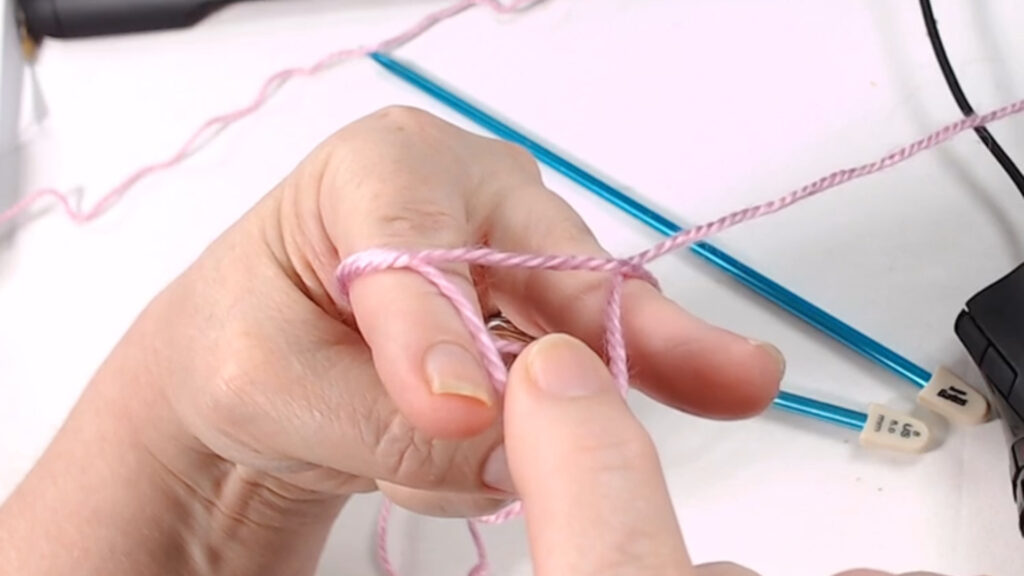
Open your two fingers slightly and reach in between them. Grab the strand that crosses in front and pull it through the loop. Then slide your two fingers out.
You now have a slip knot.
Step 6: Tighten the Knot
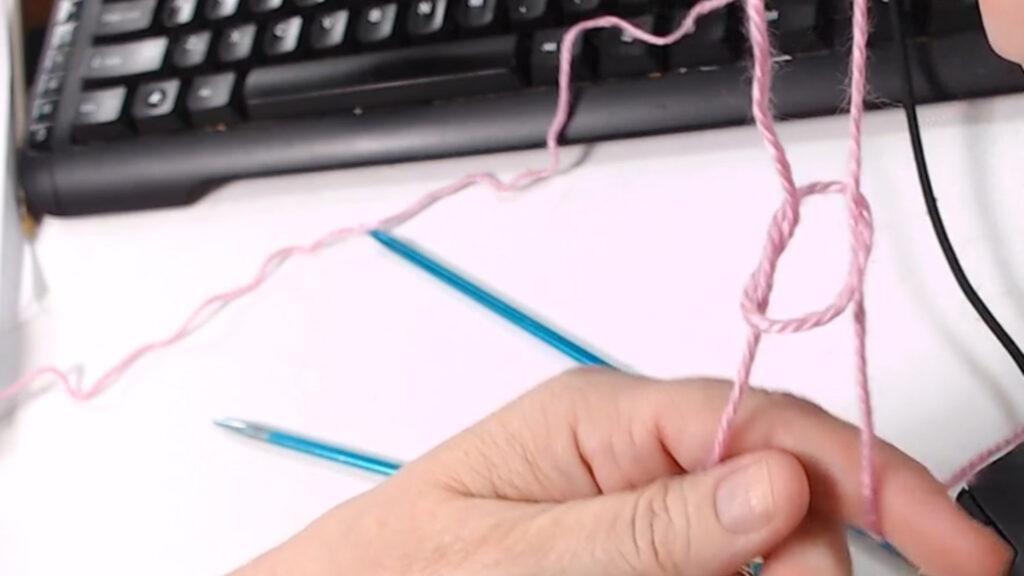
Pull gently on both tails to snug the knot into a small loop. It should tighten into a neat little circle that still slides.
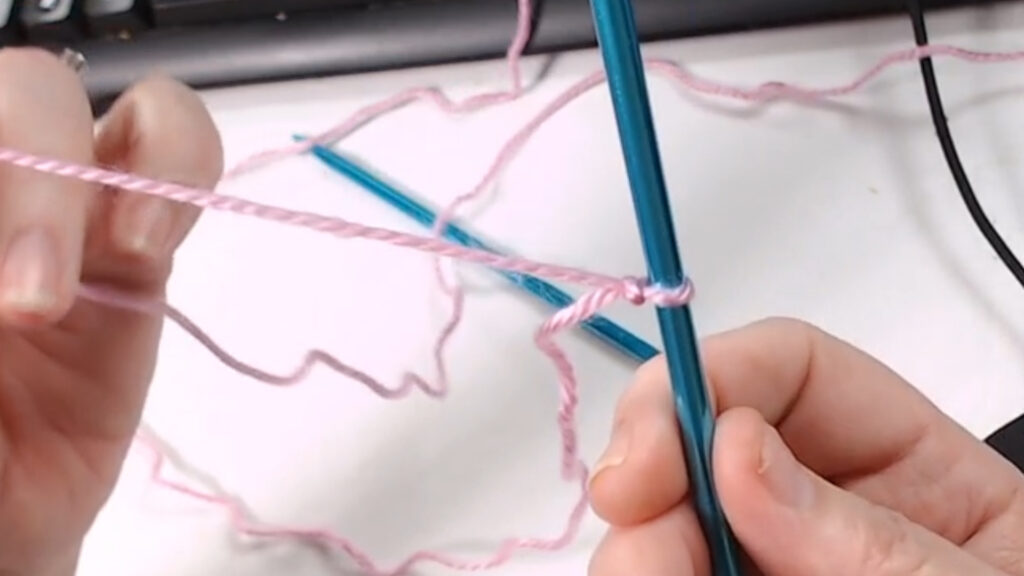
Putting the Slip Knot on the Needle
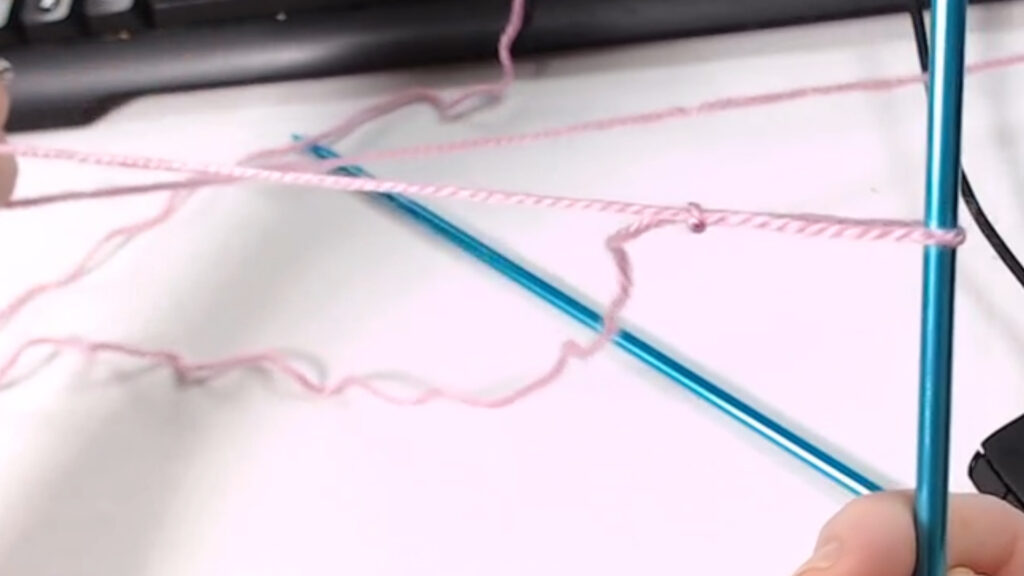
Place the loop over the tip of your knitting needle. Now pull on one tail to tighten the knot against the needle. If nothing happens, you grabbed the wrong tail. Let go and pull the other one. One tail tightens the knot onto the needle and the other one does nothing.
The slip knot should sit comfortably on the needle, snug enough that it will not fall off but loose enough that it slides along the needle without effort. You should be able to scooch it back and forth easily.
Tips for a Good Slip Knot
Watch first, then do it. It sounds simple but trying to follow along at the exact same time as watching tends to create confusion. Watch the full motion once or twice, then pause and try it yourself.
Keep the wrap loose. A tight wrap around your fingers makes the next steps harder. Relaxed fingers and relaxed yarn make the whole thing easier.
If pulling on one tail does nothing, try the other. This trips up a lot of beginners. Only one tail tightens the knot. If you pull and nothing moves, just switch to the other tail.
Snug but not tight. The slip knot should grip the needle without strangling it. If your needle cannot move through the loop at all, the knot is too tight. Loosen it and try again.
The slip knot counts as your first stitch. Once it is on the needle you are ready to start casting on. Count the slip knot as stitch number one.
Frequently Asked Questions
Does the slip knot count as a cast on stitch? Most patterns count the slip knot as the first stitch. A few do not. If your pattern specifies, follow what it says. If it does not, counting it as your first stitch is the most common approach.
What if my slip knot keeps falling off the needle? It is too loose. After you place it on the needle, pull the tightening tail a little more to snug it up. It should grip the needle without bunching.
Can I use a different method to make a slip knot? Yes. There are several ways to make a slip knot and they all produce the same result. If you already know a method that works for you, stick with it. This two-finger method is just an easy one to teach from scratch.
My slip knot looks twisted. Is that okay? As long as it sits on the needle as a clean loop and tightens properly, a little twist in the tail does not matter. It will sort itself out once you start casting on.
Final Thoughts
The slip knot is a tiny step that takes about ten seconds once you have done it a few times. It is worth practicing until it feels automatic because you will make one at the start of every single project you ever knit. A few practice runs on scrap yarn and it will be second nature.
Next Steps
- Ready to cast on? Learn the Long Tail Cast On and put that slip knot to work.
- Find more foundational skills in the Beginner Basics hub
")
")
")
