
How to Fix a Dropped Stitch Knitting Side (Stockinette)
You dropped a stitch knitting. It happens to every knitter at some point and it does not mean your project is ruined. This is a quick recovery. You stabilize the stitch, roll back to where it fell, ladder it back up row by row, and keep knitting. No ripping out required.
First things first. When you notice a dropped stitch knitting emergency, lay your knitting down before you do anything else. Have your panic attack without holding your knitting. That will help you recover better and stop the stitch from running further while your hands are tense.
There is a full video below so you can follow every step in real time.
What You Will Need
- A safety pin, spare needle, or stitch holder
- A crochet hook sized close to your knitting needle
- Your knitting needles
How to Fix a Dropped Stitch Knitting: Side Step by Step
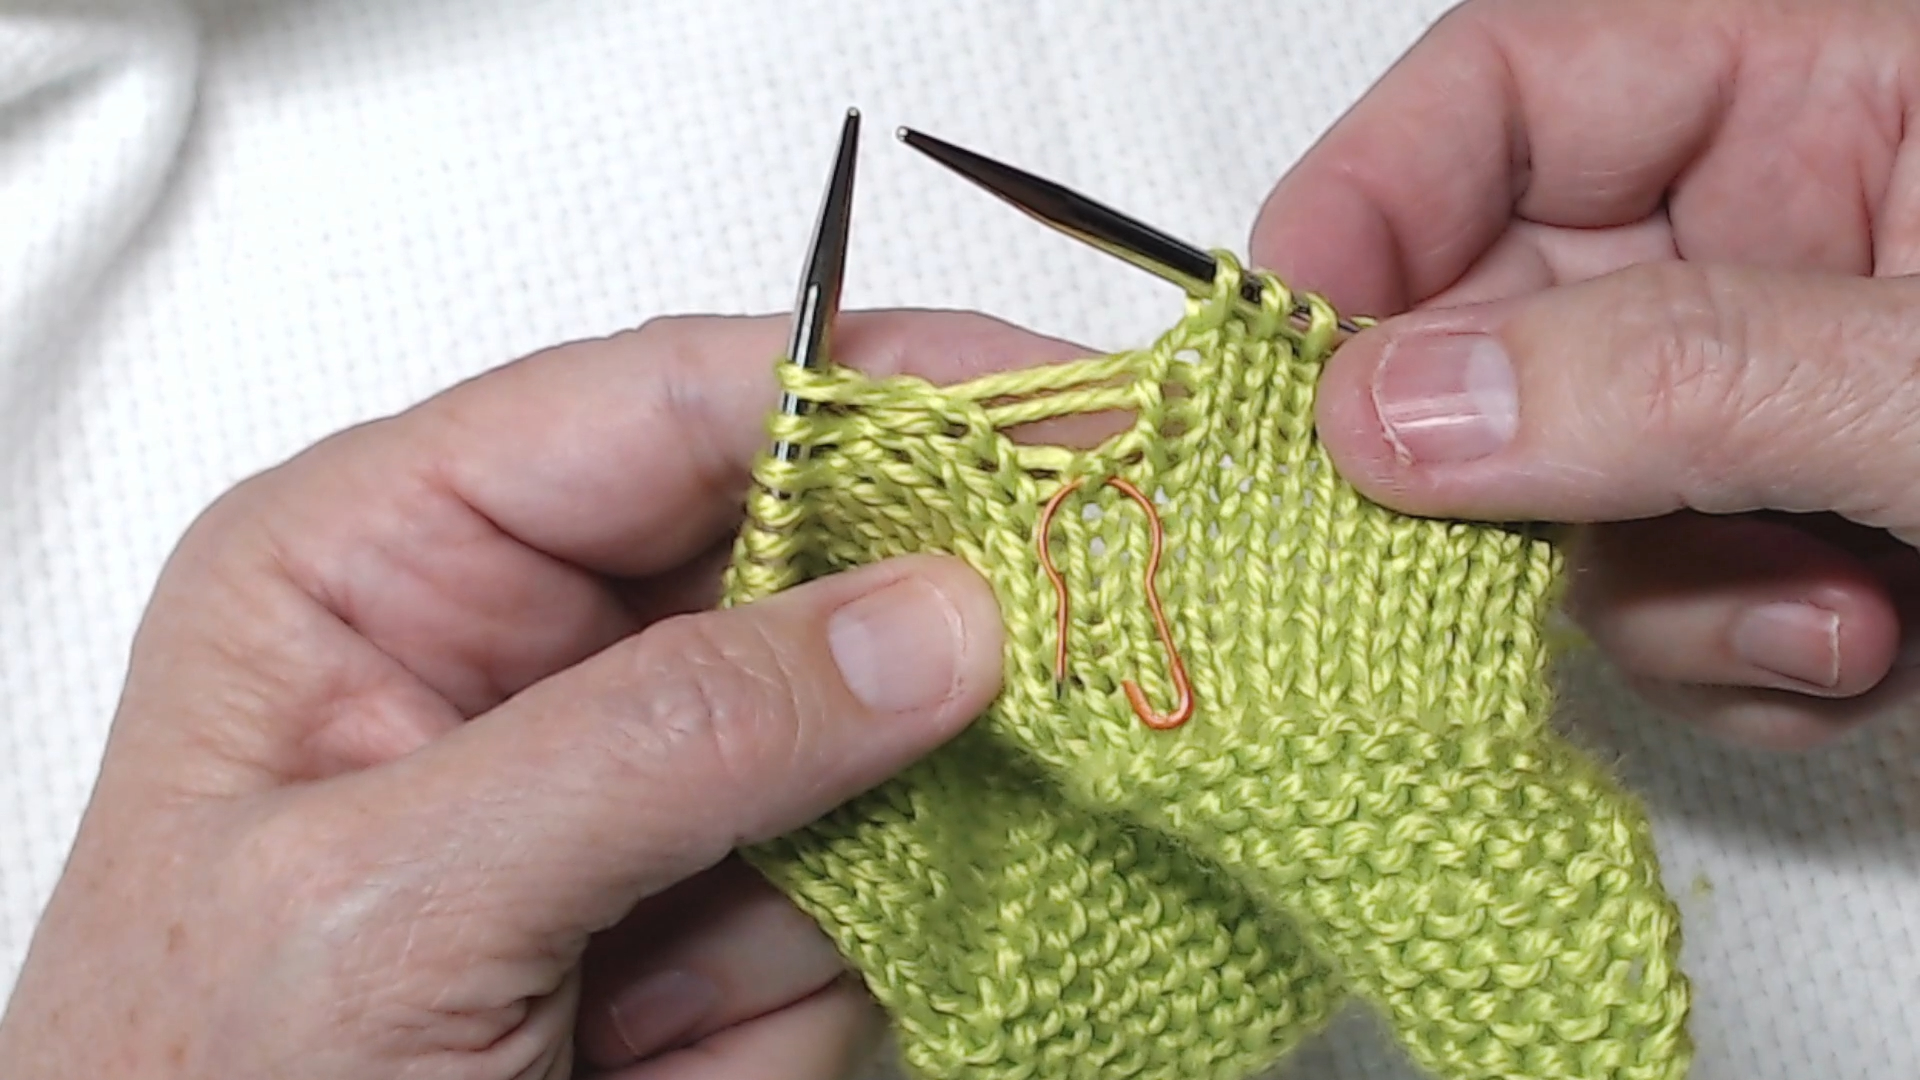
Step 1: Stabilize the Stitch
The moment you notice a dropped stitch knitting problem, stop knitting. Do not pull on the fabric or keep going hoping it will sort itself out.
Grab a safety pin, a spare needle, or a stitch holder and insert it through the dropped stitch right away. This stops the stitch from continuing to unravel while you get set up to repair it. Once that stitch is secured you can breathe again, because now you know it cannot do any more damage.
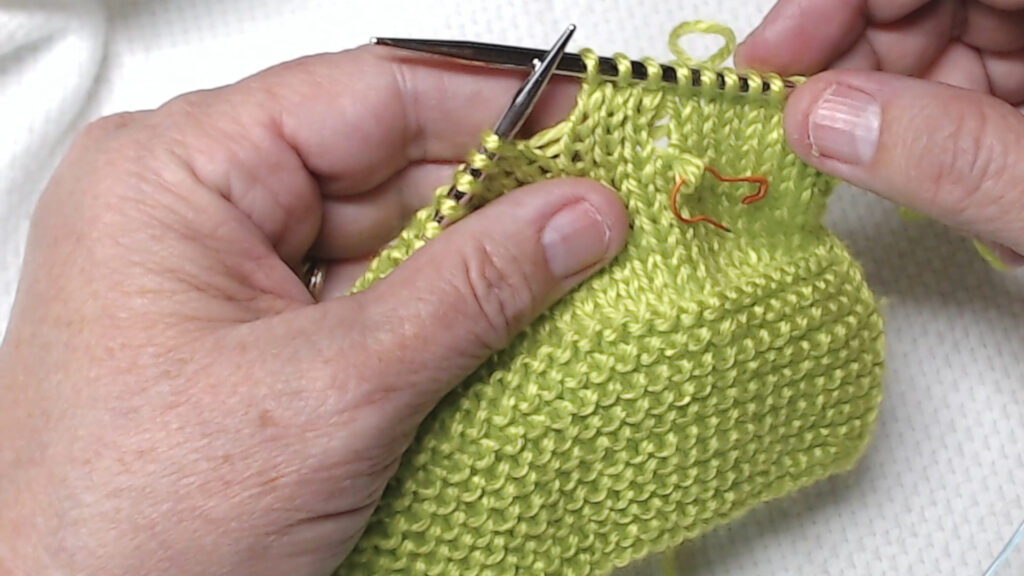
Step 2: Tink Back to the Drop Point

Now you need to get back to the exact spot where the stitch fell off. Work backwards one stitch at a time, moving stitches from your right needle back to your left needle. This is called tinking and there is a link to a full tinking tutorial in the description of the video if you need a refresher.
Go slowly and work one stitch at a time until you reach the dropped stitch. You will know you are there because you will suddenly see a series of horizontal bars hanging below the stitch. Those bars are called ladders and each one represents one row the stitch has dropped down.
While you are doing this, slide your left needle stitches back slightly from the tip so they do not accidentally fall off and give you a bigger problem to solve.
Step 3: Count the Ladders
Count the horizontal bars hanging below the dropped stitch. Two bars means the stitch dropped two rows. Three bars means three rows. You will need to bring the stitch back up one row for each bar, so knowing the count helps you track your progress.
Step 4: Bring the Stitch Back Up with a Crochet Hook
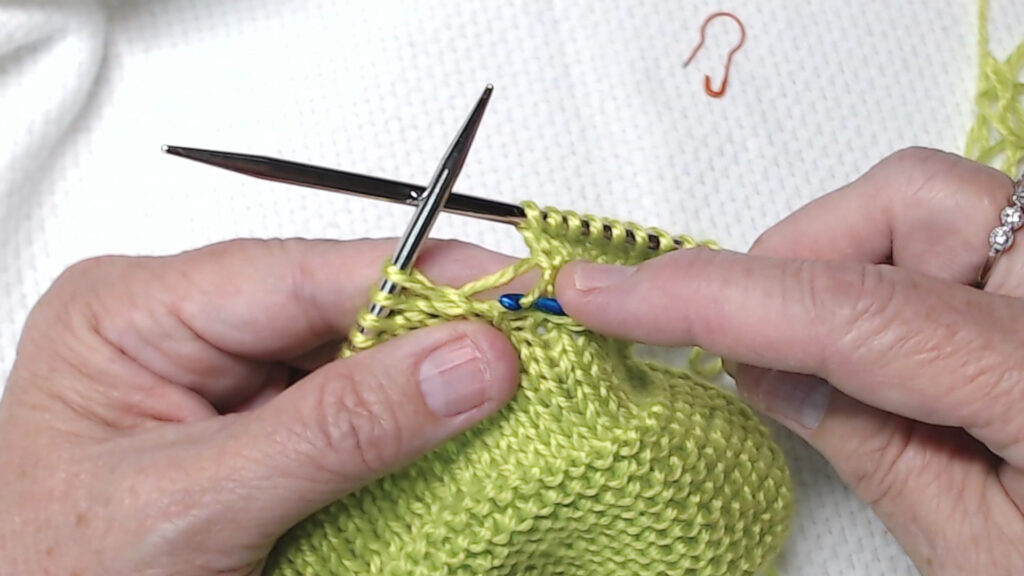
Pull the dropped stitch just slightly to give yourself a little room to work, then pinch the very bottom of the stitch between your left thumb and finger. You do not want it to get away while you are working on it.
Remove the safety pin and insert your crochet hook through the dropped stitch from front to back.
Now grab the lowest ladder bar with your hook and pull it through the stitch. That brings the stitch up one row.
Move to the next ladder bar and repeat. Pull it through the stitch now sitting on your hook. That brings it up another row.
Keep going until you have worked through every ladder bar and the stitch is back at the level of your needle.
If your yarn is fraying or splitting as you work, go slowly and make sure you are catching all the threads that belong to that strand. Some yarns are worse than others for this. Precision matters more than speed here.
Step 5: Return the Stitch to the Needle
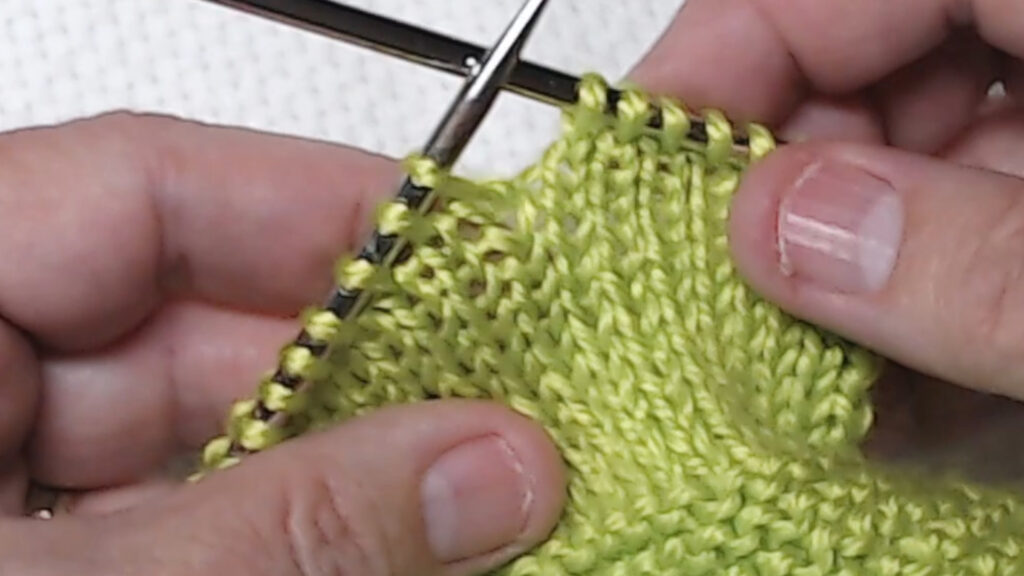
Place the repaired stitch back onto your left needle. Before you start knitting again, take a quick look at it. The stitch should sit on the needle the same way as the stitches around it. If it looks twisted, turn it around before you knit into it.
Then just keep knitting. If you look back at the repaired spot after a few more rows, you often cannot tell a stitch was ever dropped.
Tips for a Clean Repair
Pinch the stitch as you work. The dropped stitch knitting wants to keep unraveling. Keeping it pinched between your fingers while the crochet hook is not through it prevents it from escaping.
Work from the bottom ladder up. Always start with the lowest bar and work upward. Going out of order will create twisted or crossed stitches.
Check for twists before returning to the needle. A twisted stitch is easy to fix before you knit it but much harder to deal with three rows later.
Go slowly with splitty yarn. Some yarns split easily and make it hard to grab a clean ladder bar. Wiggle the hook slightly to get all the threads rather than just part of the strand.
Keep your needle stitches away from the tip while you repair. The last thing you want is more stitches falling off while you are focused on fixing one.
Frequently Asked Questions
What if the stitch has dropped many rows? The process is the same no matter how far the stitch has dropped. Just work through each ladder bar one at a time from the bottom up. It takes longer but the technique does not change.
What if I cannot find the dropped stitch? Flip your work to the purl side. A dropped stitch knitting side is often much easier to spot from the back because the loose ladder bars stand out clearly against the purl bumps.
Can I fix a dropped stitch without a crochet hook? You can use a spare knitting needle in a pinch but a crochet hook makes it much easier because the hook grabs the ladder bar cleanly. A hook sized close to your working needle works best.
My repaired stitch looks a little loose. Is that normal? Yes. The repaired area may look slightly uneven for a few rows. Keep knitting and the tension will even out on its own. Blocking your finished project will take care of most of what remains.
Final Thoughts
A dropped stitch knitting side looks scary and feels worse when it first happens. But once you have done this repair a couple of times it becomes one of the less stressful knitting fixes. Stabilize it, ladder it back up, check for twists, and keep going. Your project is going to be just fine.
Next Steps
- Dropped a stitch on the purl side instead? How to Fix a Dropped Stitch on the Purl Side
- Browse more repair tutorials in the Fixing and Recovery hub
")
")

")