
How to Fix Dropped Stitches at the End of a Row – Step-by-Step Guide
Every knitter has faced that heart-dropping moment—you look down and realize a stitch (or two!) has fallen off the needle at the end of a row. It looks messy, confusing, and maybe even a little scary. But don’t worry! To fix dropped stitches at the edge of your knitting is totally doable with a simple step-by-step method.
In this guide, I’ll show you how to repair stitches that have unraveled at the end of a row, using a crochet hook or stitch markers to make it easy. Plus, I’ve included a video tutorial so you can see exactly how to do it!
📺 Watch the step-by-step video tutorial here:
Why Dropped Stitches Happen at the End of a Row
Before we fix the problem, let’s quickly understand why stitches unravel at the edges:
🔹 Loose edge tension: If the edge stitches are too loose, they’re more likely to slip off.
🔹 Pulling too hard on your knitting: Tugging on your work can accidentally drop a stitch.
🔹 Mistakes while turning your work: If you don’t position your yarn correctly, stitches can slip.
🔹 Slippery needles: Some metal needles make stitches slip off more easily.
Luckily, fixing dropped stitches is easier than it looks! Let’s walk through the repair process step by step.
Step-by-Step: How to Fix Dropped Stitches at the End of a Row
What You’ll Need:
✅ A crochet hook (recommended) or stitch markers
✅ Your knitting needles
✅ Patience (you got this!)
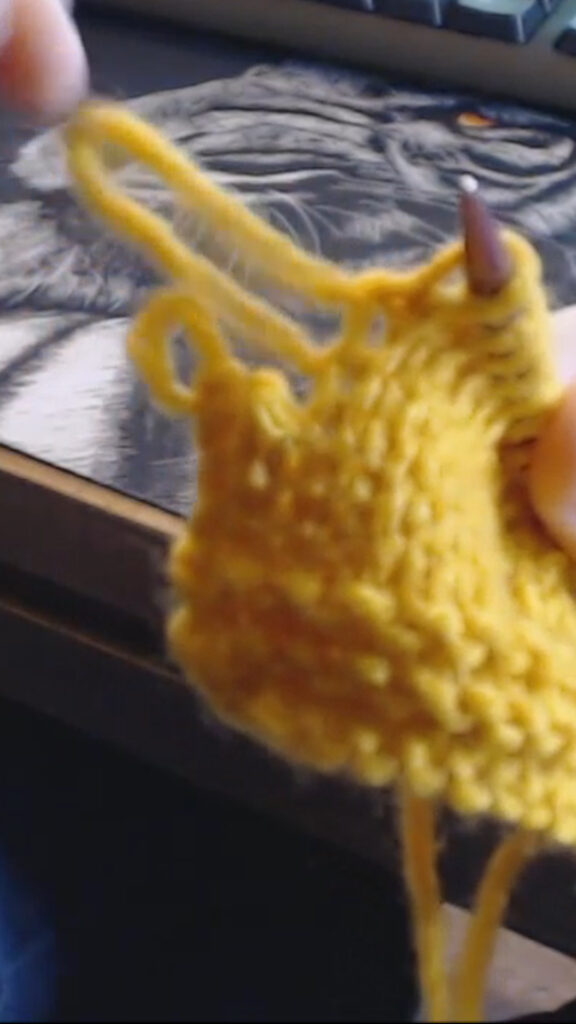
Step 1: Stop the Unraveling
🛑 First, don’t panic! The most important thing is to stop the stitches from unraveling further.
✔️ Use a stitch marker or crochet hook to secure the last intact stitch.
✔️ If multiple stitches have unraveled, catch them all with your crochet hook.
✔️ Avoid pulling on your knitting—it can make the loops bigger and harder to fix.
📌 Beginner Tip: If you don’t have a stitch marker handy, use a safety pin or scrap yarn to hold the loose stitches.
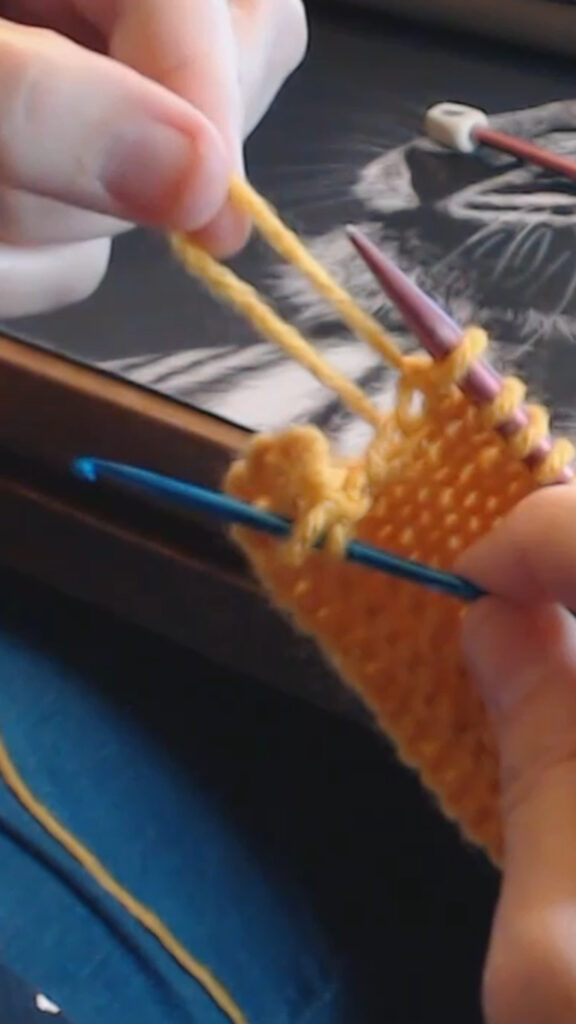
Step 2: Identify the Unraveled Rows
Look at the loose thread hanging below your work. Each horizontal strand represents a row that has unraveled.
✔️ The goal: You need to “knit” these loops back up to the working row.
✔️ Each bar = one row: The bottom loop is the first row you need to fix.
✔️ Work one stitch at a time to keep everything neat.
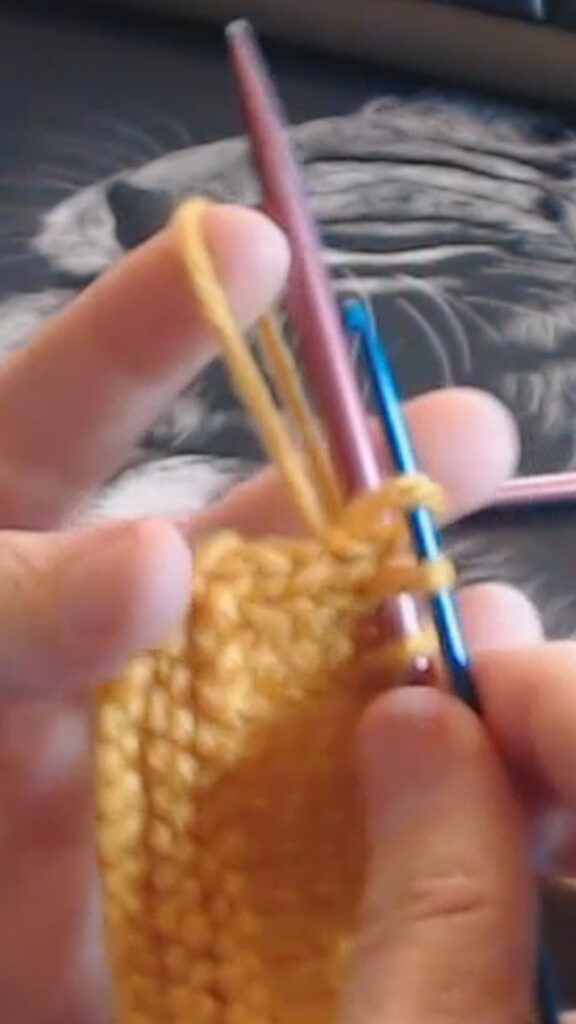
Step 3: Use a Crochet Hook to Fix the Stitches
Now, let’s bring the stitches back up:
1️⃣ Insert the crochet hook through the first loose stitch from front to back.
2️⃣ Grab the bottom bar (the lowest hanging strand of yarn) with the crochet hook.
3️⃣ Pull the bar through the loop—this recreates the missing row.
4️⃣ Move up to the next bar and repeat the process until the stitch reaches the top.
5️⃣ Once you’ve fixed it, place the stitch back onto your left needle.
📌 Troubleshooting: If your stitches look twisted, carefully reposition them before knitting the next row.
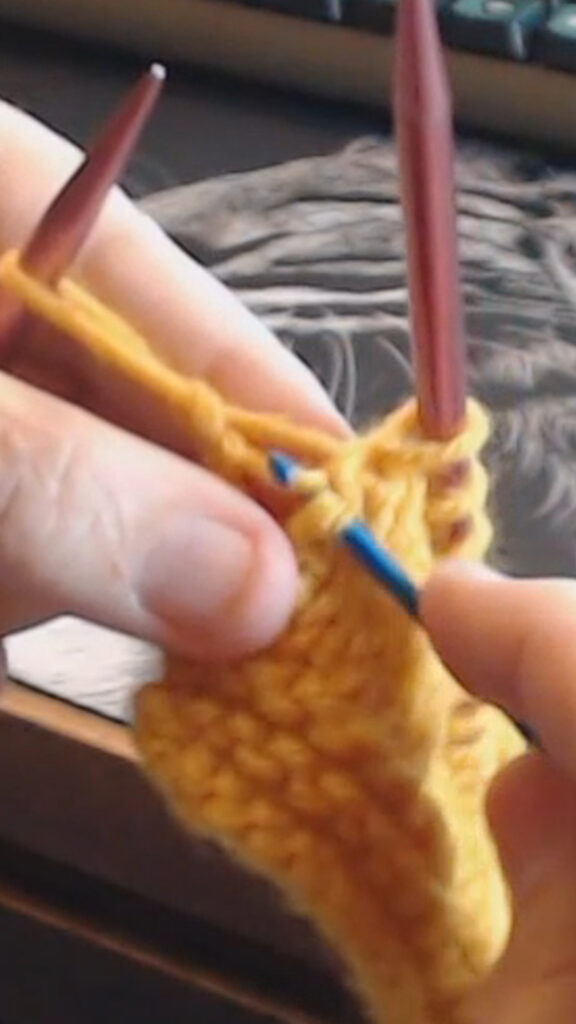
Step 4: Adjust the Tension and Knit On
After fixing the stitches, they might look a little loose or uneven. That’s okay!
✔️ Gently tug on the surrounding stitches to even out the tension.
✔️ Continue knitting as normal—with time, the stitches will blend in!
✔️ Once you wash and block your finished project, any remaining unevenness will disappear.
📌 Beginner Tip: If the edge stitches are too loose, try slipping the first stitch of each row to create a neater edge.
How to Prevent Dropped Stitches in the Future
To avoid fixing dropped stitches next time, try these simple tricks:
🔹 Use stitch markers at the edges to keep track of your stitches.
🔹 Choose bamboo or wooden needles for better grip.
🔹 Practice even tension—pulling too hard on the yarn can loosen edge stitches.
🔹 Slip the first stitch of each row to create a smooth, stable edge.
Final Thoughts
Dropped stitches at the end of a row might look scary, but they’re easy to fix with a little patience and the right tools! Using a crochet hook or stitch markers, you can quickly rescue your stitches and get back to your knitting.
Next Steps
➡️ How to Fix a Dropped Stitch on the Knit Side (Stockinette)
➡️ Need help on how to fix More Knitting Problems?
Happy knitting! 🧶✨
")

")
