
How to Pick Up and Knit Stitches Along a Slipped Stitch Edge
Ever finished a project and realized you need to add a border, a button band, or just keep knitting in a different direction? That’s where learning to pick up and knit stitches along a slipped stitch edge becomes a game-changer.
This easy technique lets you seamlessly add new sections to your knitting without sewing—and when done right, it looks clean, professional, and completely intentional.
Discover more ways to make your Edges & Finishing look neat.
Watch the Tutorial: Pick Up Stitches Neatly Along a Slip Stitch Edge
Pick Up Stitches Neatly Along a Slip Stitch Edge | Knitting Finishing Technique
In this video, I’ll walk you through picking up and knitting stitches directly into those lovely “V” shapes formed by the slipped stitch edge. I also show you how to knit in a new direction, so you can attach button bands, join panels, or expand your piece easily.
Why Use a Slipped Stitch Edge for Picking Up Stitches?
When you work a slipped stitch edge, you create a tidy row of visible stitches—like little V’s—along the side of your work. These V’s make it super easy to insert your needle evenly and keep your tension consistent when adding new stitches.
✅ Perfect for:
- Button bands on cardigans
- Shawl borders or edging
- Modular knitting (panels, blocks, etc.)
- Scarves or wraps with color changes
- Seamless knitting construction
How to Pick Up and Knit Stitches Along a Slipped Stitch Edge
Here’s a step-by-step breakdown:
1. Identify the Slipped Stitches
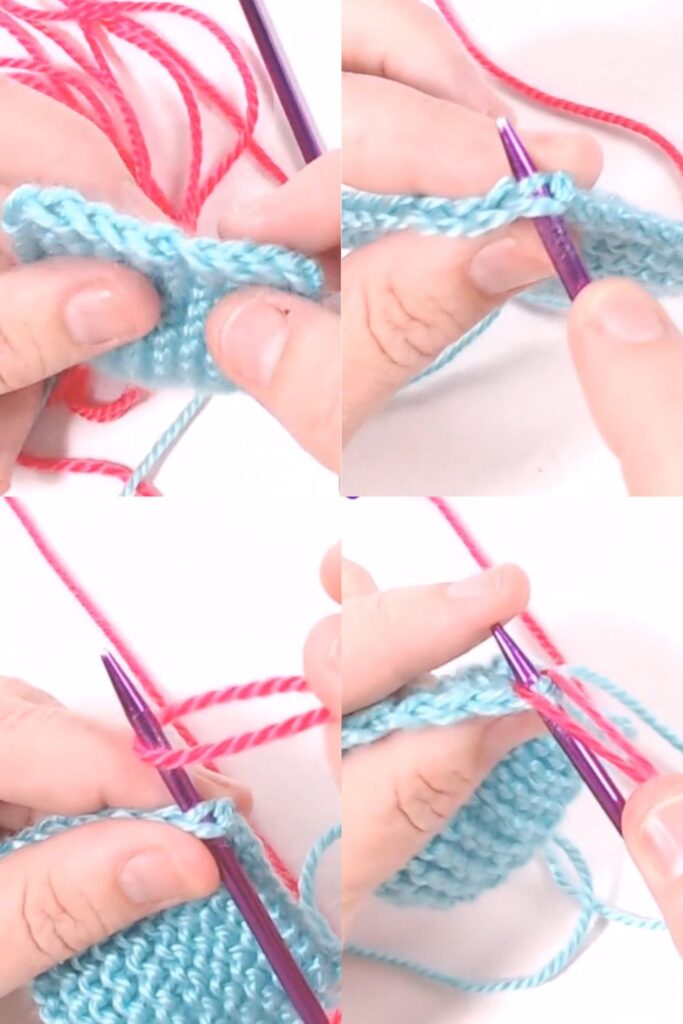
Look for the neat V-shaped stitches running along the edge of your piece. Each one will have a little hole underneath it—this is your insertion point.
2. Position Your Work
Make sure the right side (the pretty side) is facing you. For garter stitch, either side can work. For stockinette, use the smooth knit side.
3. Insert Needle Under the V
Go into the slipped stitch, making sure both “legs” of the V go over the needle. You want both strands of yarn to sit on the needle for a sturdy connection.
4. Pick Up and Knit
Wrap your working yarn around the needle as if to knit, then pull it through the hole to create a new stitch. Repeat this along the entire edge.
🎨 Pro Tip: Practice with a contrasting yarn to clearly see where each stitch goes.
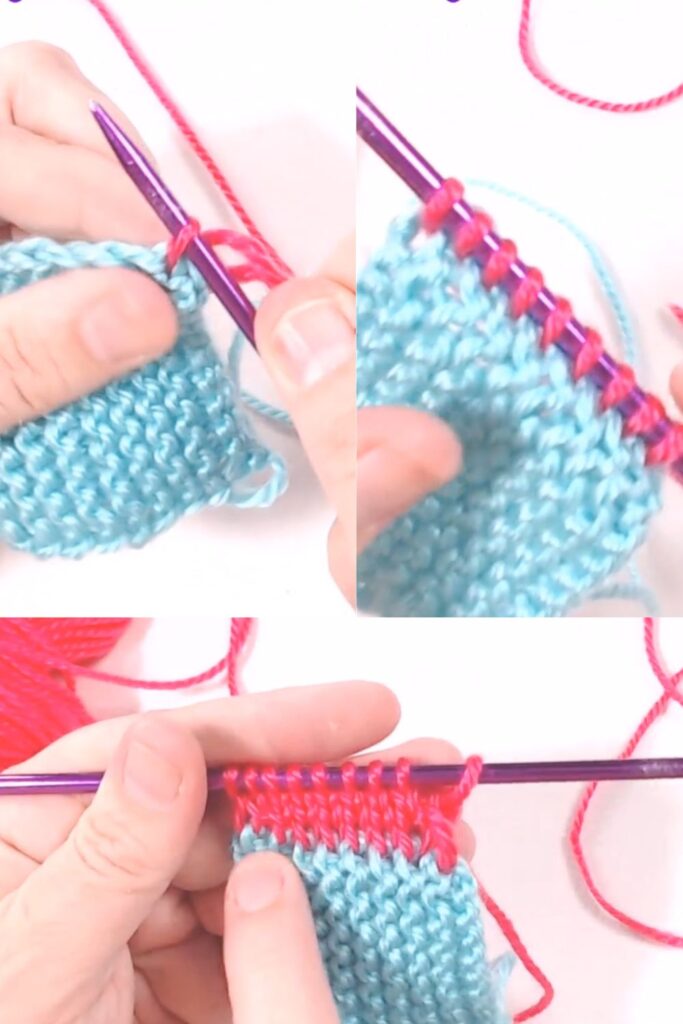
Example: Adding a Border or Button Band
In the tutorial, I use a contrasting color to demonstrate how to knit into the edge of a swatch with a slipped stitch edge. This is exactly how you’d add:
- A button band to a cardigan
- A decorative garter or ribbed border
- A new direction of knitting for modular designs
From there, you can continue knitting as normal—garter, stockinette, ribbing, anything you like!
Bonus: Continue Using a Slipped Stitch Edge on the New Section
If you’re continuing in a new direction (like turning a swatch into a scarf), you can keep slipping the first stitch of each row on the new section as well for consistency and neatness.
Depending on whether you’re knitting or purling your first row, you’ll adjust how you slip that stitch:
- Knit row: Slip the first stitch knitwise with yarn in back
- Purl row: Slip the first stitch purlwise with yarn in front
This keeps your edges looking neat no matter how you continue!
Next Steps
Slipped Stitch Edge in Garter Stitch – A Simple Trick for Neater Edges


")
