
How to Knit Mitered Squares Together (No Sewing Required!)
To Knit mitered squares is incredibly satisfying—they’re simple, portable, and perfect for creating blankets, afghans, or decorative pillows. But sewing all those little squares together? Not as much fun.
Here’s great news: you don’t have to sew them together! You can actually knit your mitered squares seamlessly as you go. Today, I’m going to show you exactly how to attach mitered squares together using a simple step-by-step “join-as-you-go” technique.
Ready to knit your next beautiful project—without sewing a single seam? Let’s dive in!
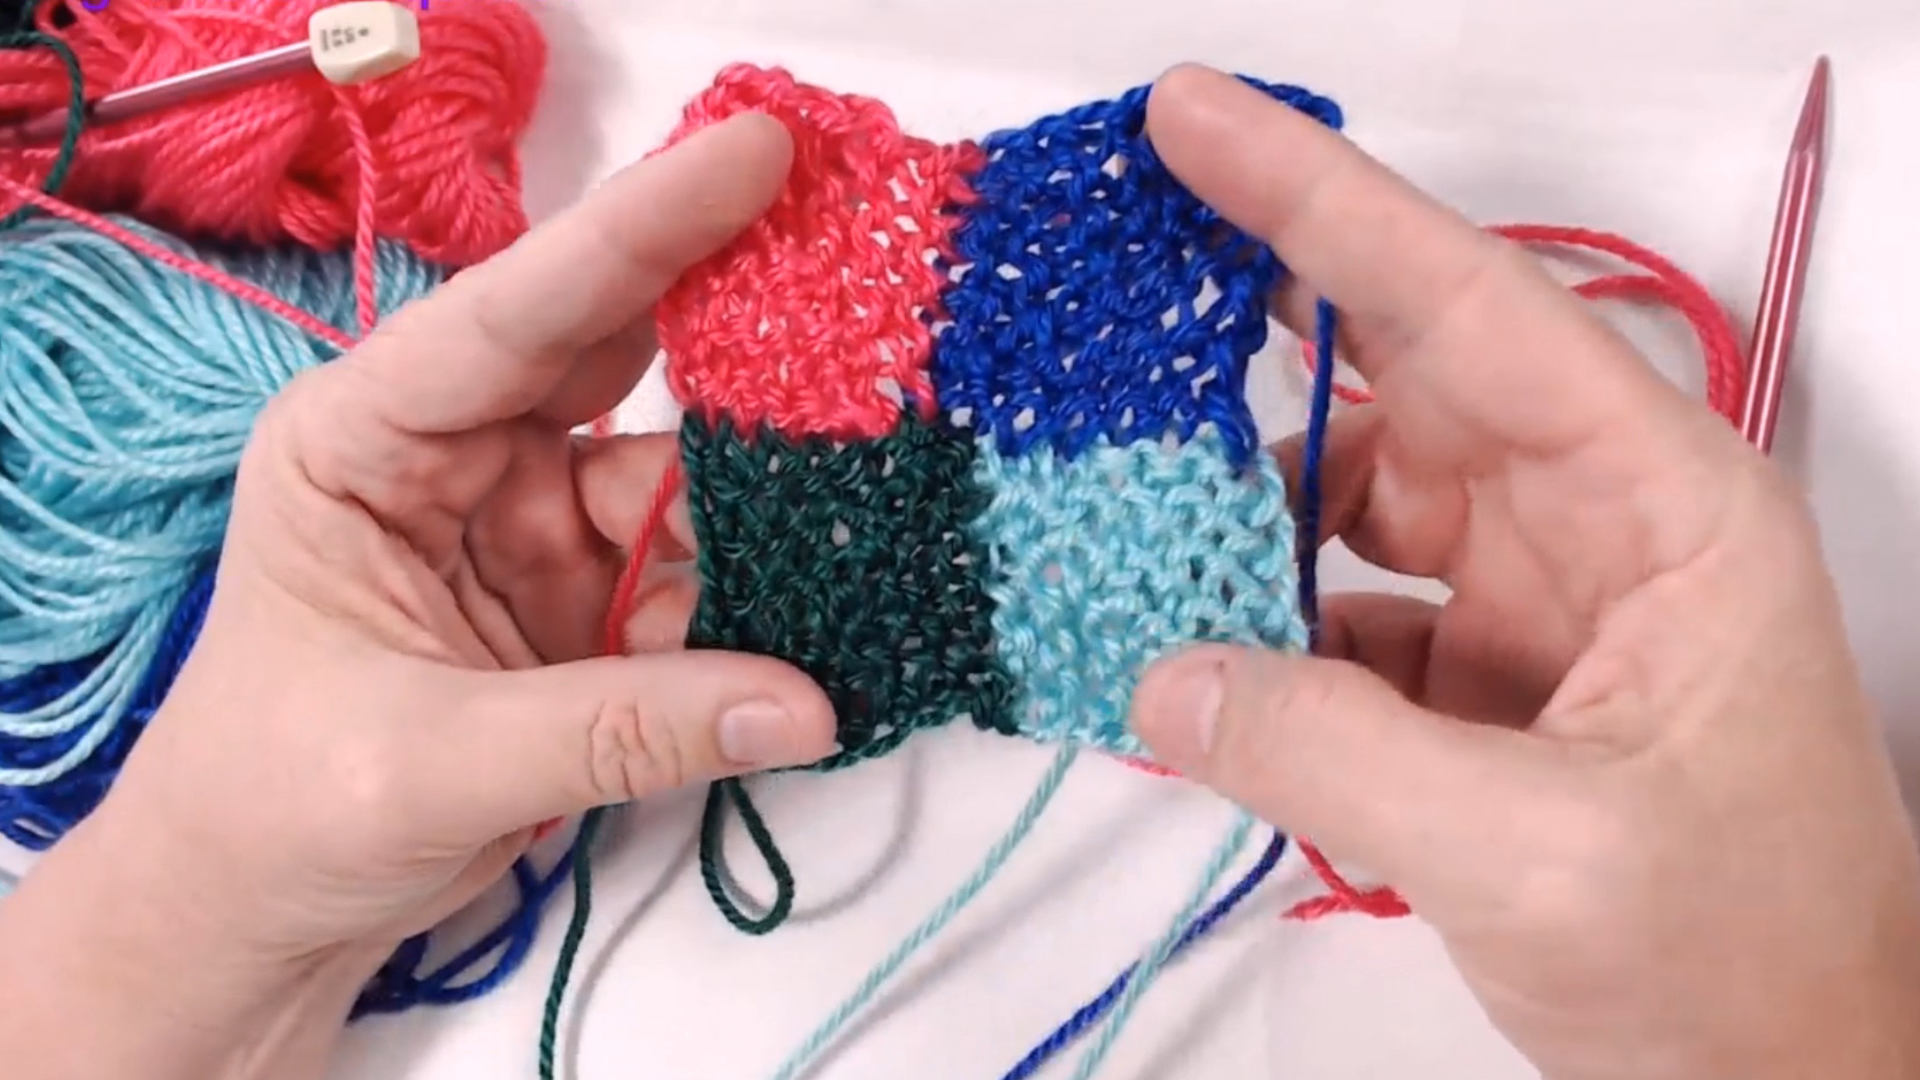
What Are Mitered Squares?
Mitered squares are knit diagonally, decreasing in the center until you reach the final stitch. They form beautifully crisp corners, making them ideal for modular projects like blankets or throws.
What’s even better? By attaching each square as you knit, you’ll never need a tapestry needle for assembly again.
📺 Watch the Video: How to Knit Mitered Squares Together
This video walks you through every step of knitting and attaching your mitered squares together—perfect if you’re new to modular knitting!
🧵 Materials You’ll Need:
- Yarn: Choose yarn suitable for your project (blankets, pillows, scarves).
- Recommended Red Heart
- Knitting needles: Appropriate size for your chosen yarn
- Scissors & tapestry needle: (Only for weaving in ends!)
Tapestry needle for weaving in ends
How to Attach Mitered Squares as You Knit (Step-by-Step):
Step 1: Cast On (Use Backward Loop Method)
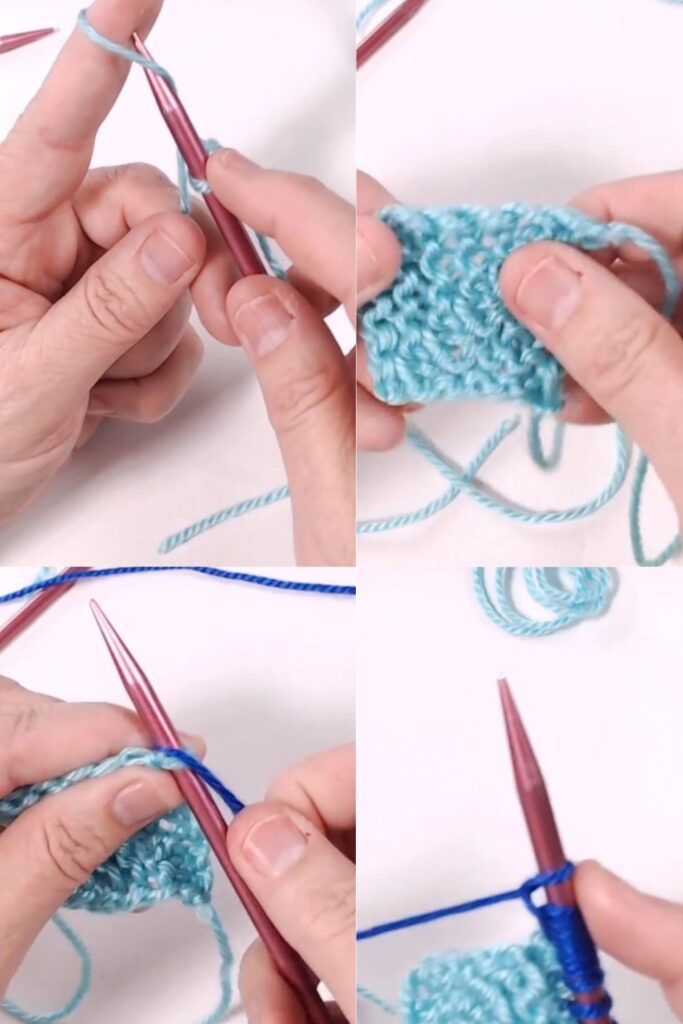
- Cast on stitches using a loose cast-on method (like the backward loop). This makes it easier to pick up stitches later.
Pro tip: Avoid a tight long-tail cast-on for modular knitting—it makes joining squares difficult.
Step 2: Knit Your First Mitered Square
- Knit your first mitered square normally, using the center double-decrease method.
- Watch my detailed Mitered Square Tutorial here
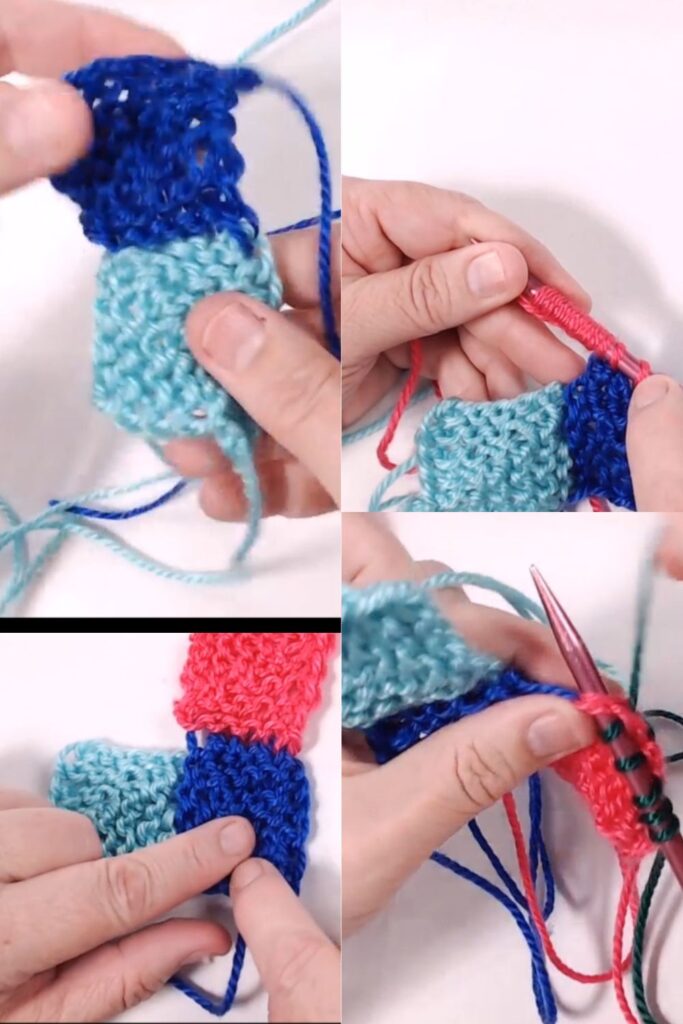
Step 3: Attaching the Next Square
- Instead of casting on separately, pick up stitches directly along the edge of the first square.
- Cast on the additional stitches you need (using the backward loop method) and knit your next square.
Repeat this step to keep adding squares!
Step 4: Continue Attaching Squares
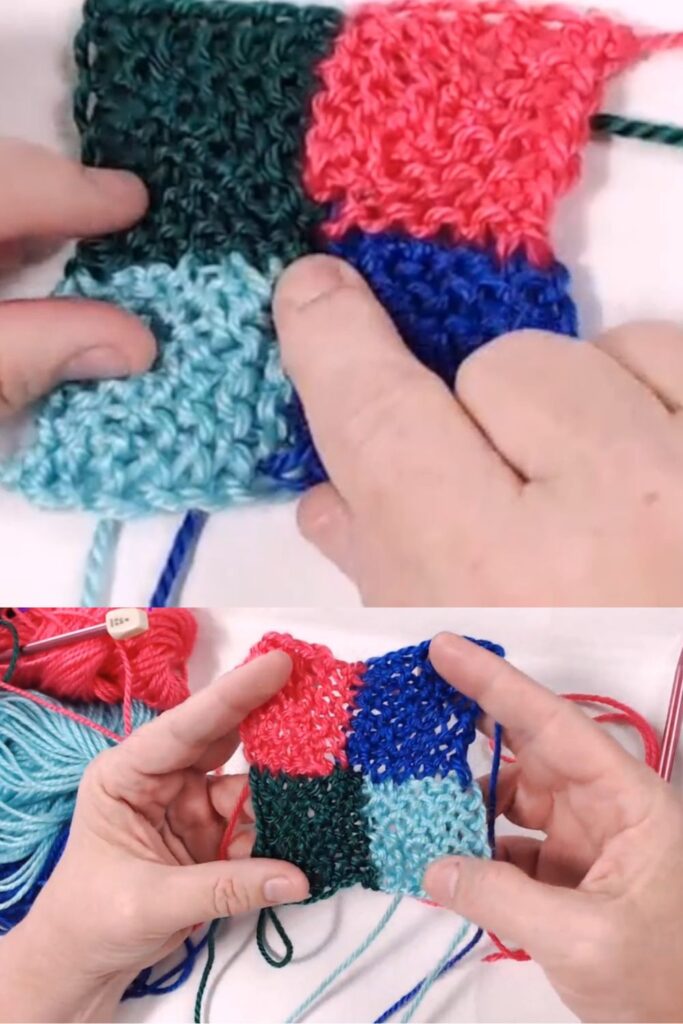
- Attach squares in groups of four, or knit as many as you’d like!
- Important: Always pick up stitches along existing edges to avoid holes.
💡 Tips for Perfect Mitered Squares:
- Slip the first stitch of each row for a tidy edge that’s easy to pick up later.
- Pick up corner stitches carefully: It helps avoid holes and gives your blanket a neat, finished look.
- Contrast colors: Use contrasting yarn to create visually appealing geometric patterns.
🧶 Explore More Patterns:
- Easy Beginner Dishcloth Pattern
- How to Knit a Slipped Stitch Edge
- 10 Cozy DIY Projects for Stress Relief
💬 Over to You!
Have you ever tried knitting mitered squares before? Are you excited to knit without sewing? I’d love to see your projects!
Tag me or share your thoughts on Instagram 👉 @jennyknitsdaily 💕
")
")
")
