
How to Purl Stitch for Beginners | Step-by-Step Knitting Tutorial (Part 3)
Once you know how to knit, the purl stitch is your next move. It’s the second most fundamental stitch in knitting, and together with the knit stitch it unlocks almost every fabric you’ll ever make. Garter stitch, stockinette, ribbing, they all come from combining these two stitches in different ways.
The good news is that the purl stitch is really just the knit stitch in reverse. Same X shape, same basic motion, but approached from the opposite direction. If knitting clicked for you, purling will too.
This tutorial walks you through the purl stitch step by step, including how to recognize which stitch to do next and what happens when you accidentally purl two rows in a row. There’s a full video below so you can follow along.
This is Part 3 of the Knitting for Beginners series:
- Part 1: Long Tail Cast On
- Part 2: How to Knit Stitch
- Part 3: How to Purl Stitch (you’re here)
- Part 4: How to Bind Off
What Is the Purl Stitch?
The purl stitch creates a small bump on the front of your work. A knit stitch creates a V. When you alternate knit rows and purl rows, the V’s stack up on one side and the bumps stack up on the other, that’s stockinette stitch, the smooth fabric you see in most t-shirts and commercial knitwear.
If you knit every single row without purling, you get garter stitch, which has ridges on both sides. Add purling and you start to have control over what your fabric looks like.
What You’ll Need
- Your knitting with stitches on the left needle
- Your working yarn
- An empty right needle
How to Purl Step by Step
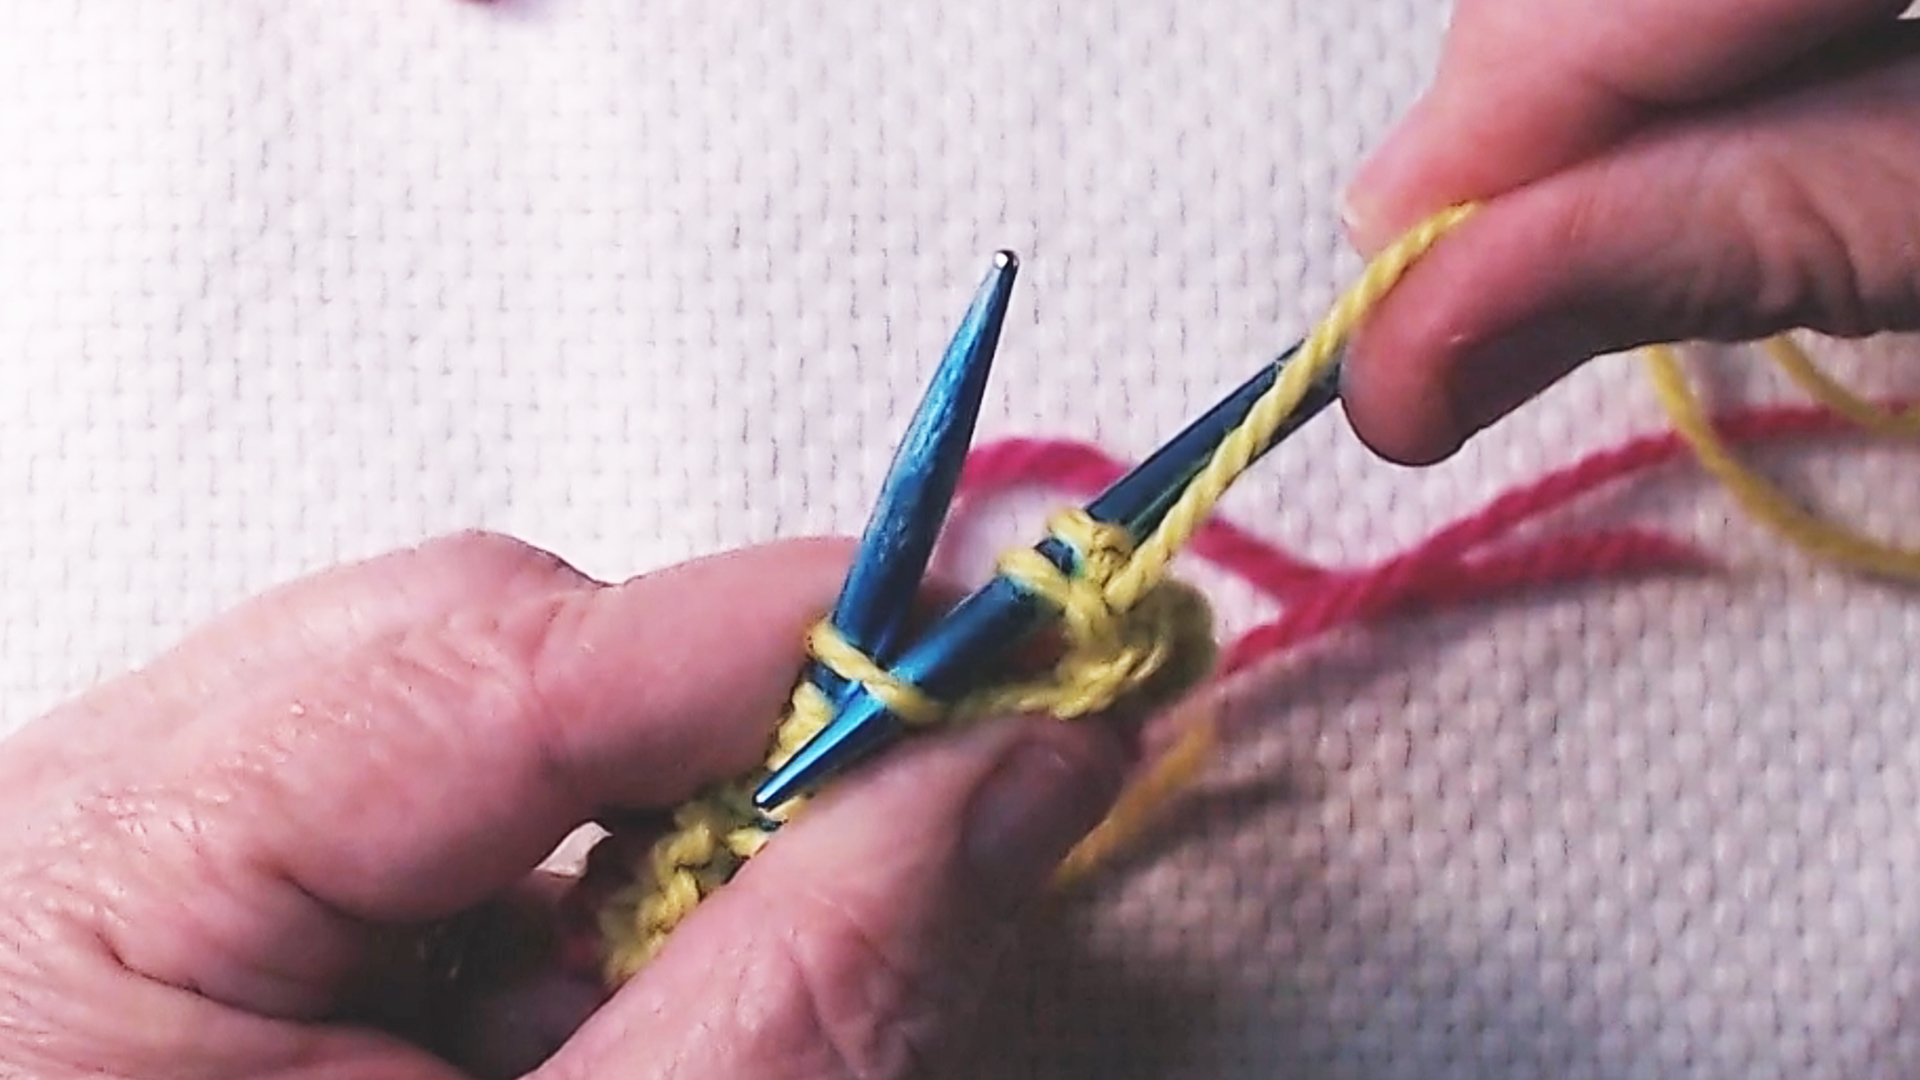
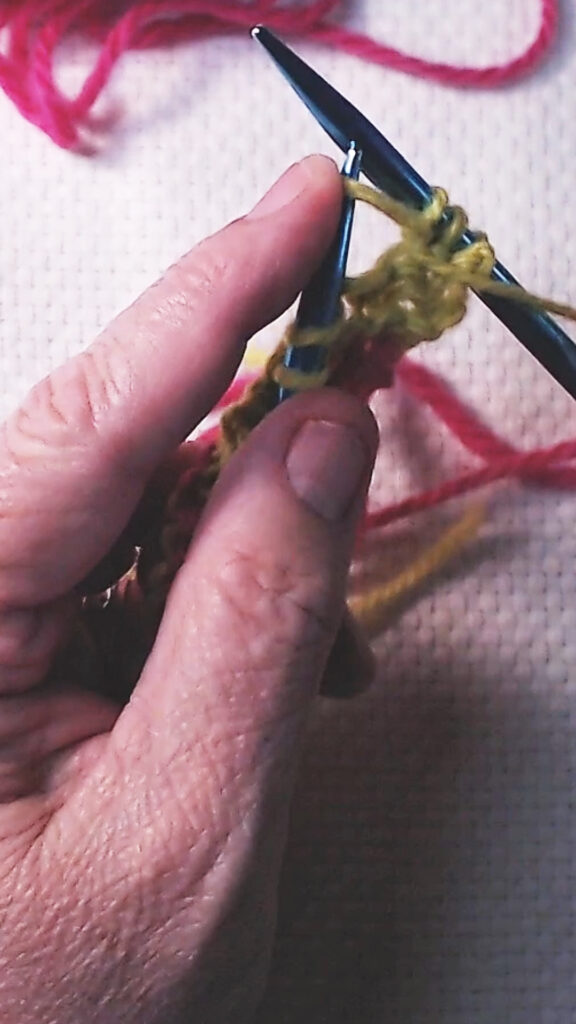
Step 1: Bring Your Yarn to the Front
Before you do anything else, bring your working yarn to the front of your work, between the two needles. This is the opposite of the knit stitch where the yarn stays in the back. Draping the yarn over your thumb is a good way to remind yourself it needs to stay in front as you work.
Step 2: Insert the Needle from the Top Down
Insert the tip of your right needle into the first stitch on your left needle, going in from the top down. This is the opposite direction from the knit stitch where you went from the bottom up.
You still make an X shape with your needles, but this time the right needle will be in front rather than in the back.
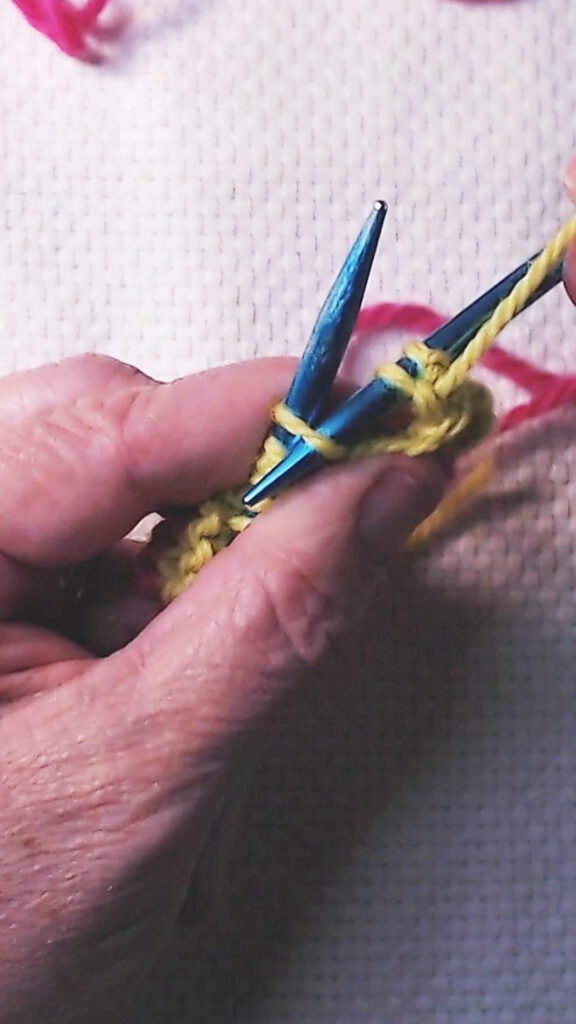
Step 3: Wrap the Yarn
Take your working yarn, go between the two needles first, then wrap it around the front needle. The wrapping direction is the reverse of what you did for the knit stitch.
Put a little tension on the yarn so it pulls through cleanly.
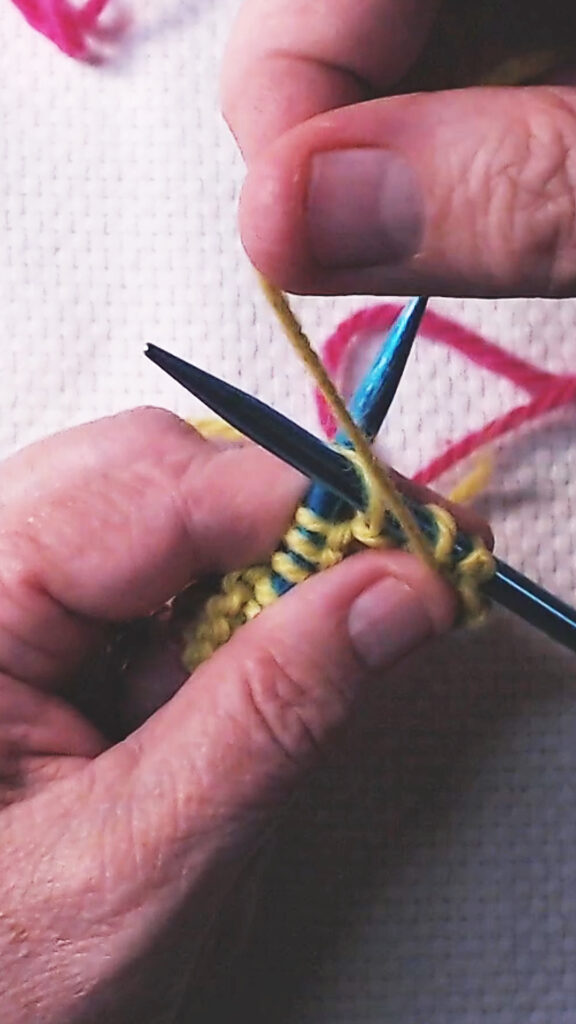
Step 4: Pull Through and Drop Off
Slowly bring the tip of your right needle back out through the hole pulling it back through the stitch you started in. It can feel a little awkward at first because the hole isn’t as visible as it is when you’re knitting. Trust that your needle wants to find that hole and guide it through.
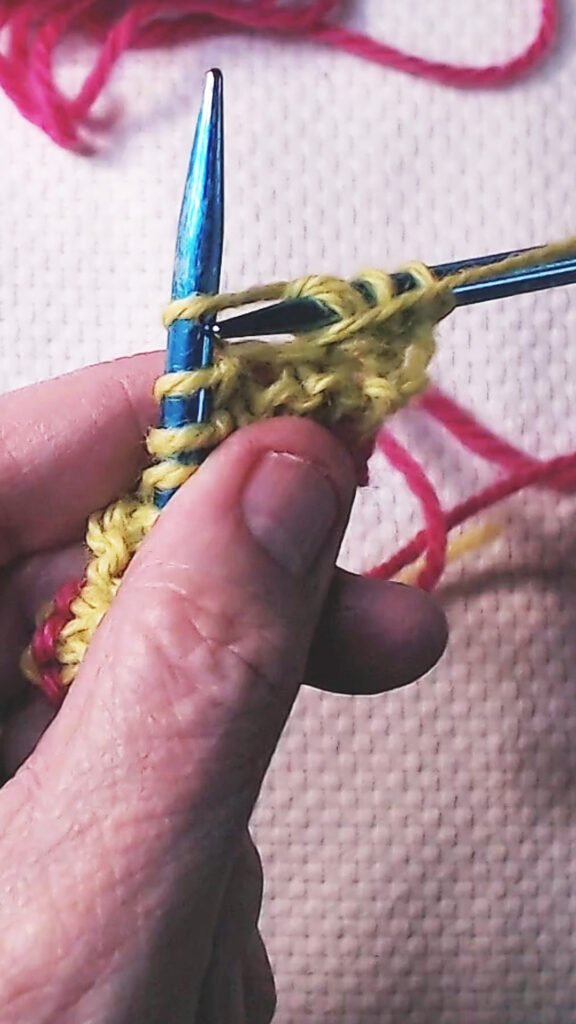
Once the new stitch is on your right needle, scooch the stitches on your left needle toward the tip and let the old stitch drop off. Same as knitting, scooch rather than yank.
That’s one purl stitch. Repeat across the row.
What Knit One Row, Purl One Row Looks Like
When you knit one row and purl one row and keep alternating, something starts to happen. All the V stitches migrate to one side of the fabric and all the bumps migrate to the other side. Pull your fabric down gently and look, you’ll see the V’s stacking up underneath each stitch on the needle. That smooth V side is the right side of stockinette stitch.
The bumpy side, where all the purl bumps land, is the wrong side or the back of the fabric.
Knit one Row then Purl one Row and repeat, this is stockinette stitch. It’s one of the most used fabrics in all of knitting.
How to Tell Which Stitch Comes Next
This is the question that trips up almost every beginner. You put your knitting down, pick it back up, and have no idea whether the next row should be a knit row or a purl row.
Look at the bottom of the stitches sitting on your needle. If you see V shapes at the base of each stitch, your last row was a purl row and your next row should be a knit row. If you see bumps at the base of each stitch, your last row was a knit row and your next row should be a purl row.
The stitches on the needle always tell you what comes next. Once you get used to reading them, you’ll stop needing to track which row you’re on.
What Happens If You Purl Two Rows in a Row
It happens. You pick up your knitting and start purling and then realize you purled the last row too. Here’s what that looks like: instead of the smooth run of V stitches on the front, you’ll see a thick raised ridge cutting across the fabric. It stands out clearly because the bumps from two consecutive purl rows stack on top of each other.
That’s a good thing to know because it means you can catch the mistake easily and fix it by tinking back to the beginning of the wrong row and knitting it correctly.
Tips for the Purl Stitch
Keep your yarn in front. This is the most common purl mistake. If your yarn slips to the back before you insert the needle, you’ll end up with an extra loop and a stitch that doesn’t look right. Check your yarn position before every stitch until the habit is automatic.
The hole can be hard to see. When you’re pulling your needle back through the stitch, the exit point isn’t as obvious as it is on the knit stitch. Go slowly and let the needle find its way out. You’ll start to feel when it’s in the right place.
Scooch, don’t yank. Same rule as the knit stitch. Use your left hand to slide stitches toward the tip so they fall off cleanly.
Your purl tension may differ from your knit tension. Many knitters purl a little looser or a little tighter than they knit. That’s normal and evens out with practice. Blocking your finished project also helps even out any tension differences.
You can mix knit and purl stitches in the same row. Knit one stitch, purl the next, knit one, purl one, that’s ribbing. It creates a stretchy fabric used for hat brims, sock cuffs, and sweater edges. Once you’re comfortable with both stitches separately, mixing them is the natural next step.
Frequently Asked Questions
What is the difference between knit and purl? The knit stitch is worked from the bottom up with the yarn in back, creating a V on the front of your work. The purl stitch is worked from the top down with the yarn in front, creating a bump. They are mirror images of each other.
Why does my purl row look bumpy on the front? That’s correct and expected. The bumps are the purl stitches. When you’re working stockinette, those bumps belong on the back of your fabric. If bumps are showing on the front, flip your work and make sure you’re purling on the correct side.
I keep adding extra stitches when I purl. What’s happening? The most likely cause is your yarn slipping to the back between stitches and then coming forward again, creating an accidental yarn over. Make sure your yarn stays consistently in front for the entire purl row.
Do I have to learn to purl? Not for every project. Garter stitch, which is knitting every row, never requires purling. But if you want to make stockinette fabric, work flat patterns, or knit most garments, purling is essential.
Final Thoughts
The purl stitch feels awkward for a few rows and then suddenly it doesn’t. The motion becomes familiar, your hands find their rhythm, and before long you’re knitting one row and purling the next without thinking about which one comes next. That’s when knitting starts to feel like something you actually know how to do.
Next Steps
- Ready to finish your first project? Learn How to Bind Off (Part 4)
- Find more foundational skills in the Beginner Basics hub
")
")

")